Online Card Classes have been offering lots of new ways to make use of our many dies. Shari Carroll inspired me with her card today in using a stamp and die set to create a window with dsp behind the opening.
After stamping a piece of acetate with white ink and embossing with white ep, I attached it behind the matching die cut and popped the panel up over the dsp and a coordinating side strip. The sequins, bow and glitter paper provide just enough bling, while the embroidery floss gives the card some color and texture.
The inside verse reads, "May your spirit keep the freedom of a butterfly in spring, may your heart be filled always with the joys of simple things...etc."
If you haven't tried an Online Card Class, treat yourself to one of them soon--you'll learn a lot of neat stuff!.
A site to post my latest hand-stamped greeting cards. BE SURE TO CLICK ON PHOTOS TO ENLARGE!
Friday, March 20, 2015
WINTER'S LAST GASP!
It's snowing like crazy around here today!
We already have 3 inches on the ground, with more on the way.
I have a stamp that says
"No matter how long the winter,
Spring is sure to follow."
Hope abounds...
Thursday, March 19, 2015
HAPPY SPRING!
With another 3-6" of snow expected on Friday, this card may have to wait a bit longer before mailing! Seems like the seasons are alternating this week. Yesterday was very windy and cold (high of 34) today near fifty and tomorrow more snow, then up in the 40's again on Saturday.
I have a stamp I might use for the inside of this card:
"No matter how long the winter, Spring is sure to follow."
I have a stamp I might use for the inside of this card:
"No matter how long the winter, Spring is sure to follow."
Wednesday, March 18, 2015
Meow Card
I couldn't resist this cat dsp I saw at Hobby Lobby!
Using the cat die from last year's Halloween set, I made it look like Jenny. The inside will remain blank until I decide what to use it for.
Meanwhile, Jenny (my "stampin' buddy") has a new bed in the tower where she likes to keep me company.
Using the cat die from last year's Halloween set, I made it look like Jenny. The inside will remain blank until I decide what to use it for.
Meanwhile, Jenny (my "stampin' buddy") has a new bed in the tower where she likes to keep me company.
Thursday, March 5, 2015
I'M BACK!
Thanks to all the snow storms we've been getting, (every week!) I've had lots of spare time to get creative. I'm finally caught up with all the other things I've had to do, one of which was to send out 20 thankyou notes to friends who supported me with their prayers during the difficult days away from home with my dad during his last days. When I got home, there were flowers, homemade soups and visits to help lift my spirits. The Lord has truly blessed me with wonderful Christian friends.
Please scroll down to look at the cards I posted today. It's been snowing (again!), but I think this may be the last of it until next winter. I will NOT be sad to see it go, and neither will my cats! Meanwhile, the stamping tower has been providing the opportunity to relax and stamp up a storm (excuse the pun.)
SCRAP DRAWER #48--CONTINUED
Nothing says Spring! like butterflies and blossoms. Here are the first of five cards I made with the tags I punched from my scraps (shown in a prior post.)
These should make good encouragement cards.
SOMETIMES WRONG IS GOOD!
The weather forecasters were all over the scale in predicting the amount of snow we'd get today. So far, we have 3" of new snow, but it has stopped here. We were told to expect amounts up to 10 inches! I sure hope this is the last of it for this season. We haven't seen the grass since late January...time for crocuses and daffodils. Even our cats have cabin fever!
I'm soooo glad the weather predictions were wrong this time.
FROM THE HERD
This stamp set just cracked me up when I saw it in the SU! Occasions catalog.
For this card, I used colored pencils which made it easier to get into small places. I just adore all these faces, don't you?
After coloring everything in, I decided the pig was just too pink. One of my friends suggested it was because he was too clean for a pig, so I added some mud. I like that much better!
This is one of those stamps that does all the work for you--just stamp it, color it and mail it.
PS. Check out a really clever card on Split Coast Stampers using this set. I saw it when I posted this card there earlier. It's the one that's to the right of mine.
For this card, I used colored pencils which made it easier to get into small places. I just adore all these faces, don't you?
After coloring everything in, I decided the pig was just too pink. One of my friends suggested it was because he was too clean for a pig, so I added some mud. I like that much better!
This is one of those stamps that does all the work for you--just stamp it, color it and mail it.
PS. Check out a really clever card on Split Coast Stampers using this set. I saw it when I posted this card there earlier. It's the one that's to the right of mine.
SCRAP DRAWER #48
My new SU! tag punch has come in handy. I pulled out my dsp scraps and went crazy with it--what fun!
Can't wait to use these on some Spring cards...
Saturday, February 14, 2015
IN MEMORIUM
This past Thursday my dad died at the age of 96 after a rapid decline that started only a month ago. Up until then he had been doing well with Assisted Living, well loved by the residents and staff there. He was truly amazing!
All who knew him will remember him most for his sense of humor, constant smile and friendly personality. Wherever he went, he looked for ways to be helpful and positive, with never a complaint. I consider it a blessing and a privilege to have had him in my life for so long.
We are all sad, of course; but the one who is feeling the loss most is our youngest grandson. He was recently bragging to his friends at Kindergarten that he had a great-grampa who was 96. My dad was here for Christmas, walking into our house on his own and eating dinner with all 12 of us around the table. I'm so glad he was able to be here for one last family gathering, leaving a happy memory of that special Christmas, especially for his youngest great grandchild.
We look forward to the day when God "will wipe away every tear from (our) eyes, and death shall be no more..." (Rev. 21:4)
All who knew him will remember him most for his sense of humor, constant smile and friendly personality. Wherever he went, he looked for ways to be helpful and positive, with never a complaint. I consider it a blessing and a privilege to have had him in my life for so long.
We are all sad, of course; but the one who is feeling the loss most is our youngest grandson. He was recently bragging to his friends at Kindergarten that he had a great-grampa who was 96. My dad was here for Christmas, walking into our house on his own and eating dinner with all 12 of us around the table. I'm so glad he was able to be here for one last family gathering, leaving a happy memory of that special Christmas, especially for his youngest great grandchild.
We look forward to the day when God "will wipe away every tear from (our) eyes, and death shall be no more..." (Rev. 21:4)
Friday, February 13, 2015
FROM THE SCRAP DRAWER--Danish Heart Valentine
After making Danish Heart cards in Mothers Class this week, I had some left over pieces and scraps from other cards. So I put them together in this smaller version for someone special.
Enjoy!
Enjoy!
Thursday, February 12, 2015
CRITTER CHICK
This set of Cheerful Critters makes happy cards! This one is for a birthday.
The image is layered over a scrap of white cs cut to size and edged with a yellow marker for a perfect match. The orange embroidery floss was wrapped around the top 2 layers before being mounted with dimensionals onto a small piece of dsp. The green textured cs is from a pad I purchased at Hobby Lobby.
Using this set is super quick!
The image is layered over a scrap of white cs cut to size and edged with a yellow marker for a perfect match. The orange embroidery floss was wrapped around the top 2 layers before being mounted with dimensionals onto a small piece of dsp. The green textured cs is from a pad I purchased at Hobby Lobby.
Using this set is super quick!
Wednesday, February 11, 2015
FISHY VALENTINE
Since I'm not in school (as a student, anyway) I plan to send this to one of my students in the Mothers Class. I also made a bunch of shaker cards with this design for my youngest grandson to hand out in his Kindergarten class.
What a cute set this is!
Saturday, February 7, 2015
DE-CLUTTER DE HOUSE--Low cabinets
Just the lower cabinets in the kitchen and bathrooms... You know the ones I mean--like the one that has the _____(fill in the blank)_____ that fall(s) out when you open the door. For me, it's the tupperware cabinet! Time to straighten them out and store things more securely and/or more reachable in the back of these cabinets.
If you don't have cabinets in the bathrooms, then hit the linen closet! Rise to the challenges in this year's series, and you'll be ready to enjoy the great outdoors come Spring! Remember, clutter is not something to organize--it's something to give or throw away. Once the clutter is gone, cleaning is soooo much easier...
Go for it!
If you don't have cabinets in the bathrooms, then hit the linen closet! Rise to the challenges in this year's series, and you'll be ready to enjoy the great outdoors come Spring! Remember, clutter is not something to organize--it's something to give or throw away. Once the clutter is gone, cleaning is soooo much easier...
Go for it!
Monday, February 2, 2015
SALE-A-BRATION GOODIES!
WOW! Did I clean up with my SU! party! Here is what I got:
2 pkgs of cardstock and 2 of designer papers
2 pkgs of dimensionals
the coordinating embossing folder
the tag punch
1 pkg of twine
1 container of silver embellishments
and SIX! stamp sets
With my hostess benefits, the Sale-a-bration freebie and the Christmas gift certificate from my favorite DIL, this whole assortment cost me less than $40, including tax and shipping--YAY!
I'm ready to start stamping! (understatement...)
2 pkgs of cardstock and 2 of designer papers
2 pkgs of dimensionals
the coordinating embossing folder
the tag punch
1 pkg of twine
1 container of silver embellishments
and SIX! stamp sets
With my hostess benefits, the Sale-a-bration freebie and the Christmas gift certificate from my favorite DIL, this whole assortment cost me less than $40, including tax and shipping--YAY!
I'm ready to start stamping! (understatement...)
Saturday, January 31, 2015
TIME TO DE-CLUTTER DE HOUSE AGAIN!
With all the winter storms badgering our area this winter, forcing us to stay inside waaaay more than we would like, it's time to put some cabin fever to good use!
HERE'S THE CHALLENGE: Start with purging the paper piles in the house. We don't need those Christmas catalogs any more, do we? File what needs filing, shred what needs shredding, and do some purging and tossing. Then brag about your accomplishments here where it might give someone else a boost.
Next week will be a new challenge, so let's get started!
Here's a tip: I've cut down on the space used for white cardstock scraps (I use them for small greetings on cards) by following my rule of keeping only those pieces that are larger than a business card. When the scrap drawer gets too full, I just go through it and toss the smaller pieces (or give them away.)
HERE'S THE CHALLENGE: Start with purging the paper piles in the house. We don't need those Christmas catalogs any more, do we? File what needs filing, shred what needs shredding, and do some purging and tossing. Then brag about your accomplishments here where it might give someone else a boost.
Next week will be a new challenge, so let's get started!
Here's a tip: I've cut down on the space used for white cardstock scraps (I use them for small greetings on cards) by following my rule of keeping only those pieces that are larger than a business card. When the scrap drawer gets too full, I just go through it and toss the smaller pieces (or give them away.)
Friday, January 30, 2015
TUXEDO CAT CARD
This will be going to a special friend who also happens to like our two cats, and this card features one of them. The cat is a die cut, and I used a cloud die to accent the purring.
Inside, I signed it from our family, "both human and feline." He will definitely laugh when he reads that. Our cats befriended him when he was here doing some work for us. If you know anything about cats, it is not common for them to be so friendly toward a "stranger" but for this person they made a delightful exception.
Wednesday, January 28, 2015
MONOCHROMATIC DESIGN
For this card, I started with a scrap of fern dsp. This gave me the color, stamp and die cut I would use.
First I stamped the fern twice from a set by Papertrey Ink, then cut them with the matching die. The greeting was also part of the same set.
The light colored panel is green parchment paper from my stash, and the card base is SU! Always Artichoke. After mounting the ferns with dimensionals, I stamped the greeting with Versafine Olympia Green ink and added some tiny white pearls for a soft finishing touch.
It really is a challenge to stick to one color family!
First I stamped the fern twice from a set by Papertrey Ink, then cut them with the matching die. The greeting was also part of the same set.
The light colored panel is green parchment paper from my stash, and the card base is SU! Always Artichoke. After mounting the ferns with dimensionals, I stamped the greeting with Versafine Olympia Green ink and added some tiny white pearls for a soft finishing touch.
It really is a challenge to stick to one color family!
Tuesday, January 27, 2015
THREE OF A KIND--DANISH HEARTS
After using the Love die, I glued the message to the heart and added some smaller hearts and gems to finish.
Although they look clean and simple, there were many steps involved. The weaving took the most time, but I think it was worth it for such a special card.
Sunday, January 25, 2015
THREE OF A KIND--ORGANIC GRACE
Saturday, January 24, 2015
MORE PASTOR CARDS
The sentiments on these two cards are from the SU! set, "Trust God" which has some really nice sayings.
While waiting for my SU! order to arrive, I've been going back to some of my old sets and using them in new ways. This first one uses the fern from Organic Grace, stamped three times without re-inking, and the splotches from French Foliage which is still one of my all-time favorite sets. I also still enjoy the Butterflies Sizzlit, especially the tiny butterflies.
The second card started with a retro design panel mounted to a light blue card. Because of the glitter already imbedded in the dsp, no further embellishments were needed.
The envelope of flowers is one of the stamps from "Send a Celebration," and I colored them with my colored pencils set.
I just hope these aren't too feminine for our pastor.
While waiting for my SU! order to arrive, I've been going back to some of my old sets and using them in new ways. This first one uses the fern from Organic Grace, stamped three times without re-inking, and the splotches from French Foliage which is still one of my all-time favorite sets. I also still enjoy the Butterflies Sizzlit, especially the tiny butterflies.
The second card started with a retro design panel mounted to a light blue card. Because of the glitter already imbedded in the dsp, no further embellishments were needed.
The envelope of flowers is one of the stamps from "Send a Celebration," and I colored them with my colored pencils set.
I just hope these aren't too feminine for our pastor.
Thursday, January 22, 2015
ARE YOU A CHEESE?
If not, then don't let your age bother you!
With my warped sense of humor, I thought the dotted swiss strip was the perfect accent for a swiss cheese image ;) The plaid background was in my drawer of 12x12 dsp sheets, and very Spring-y. This card will go to an Irish lady this month.
NOTE: If you haven't taken advantage of the Sale-a-Bration promotion going on at Stampin'Up, take a look at what they have to offer. I was a hostess last week with 10 guests. Not only did we have a good time (lots of laughs!) but I also received over $100 worth of free products plus one free set from the Sale-a-Bration catalog. When the shipment comes in, I'll photograph what I got so you can see. The new Occasions catalog is the best they've come out with in awhile, so be sure to check it out. (BTW, I'm not a demonstrator--just a happy customer!)
With my warped sense of humor, I thought the dotted swiss strip was the perfect accent for a swiss cheese image ;) The plaid background was in my drawer of 12x12 dsp sheets, and very Spring-y. This card will go to an Irish lady this month.
NOTE: If you haven't taken advantage of the Sale-a-Bration promotion going on at Stampin'Up, take a look at what they have to offer. I was a hostess last week with 10 guests. Not only did we have a good time (lots of laughs!) but I also received over $100 worth of free products plus one free set from the Sale-a-Bration catalog. When the shipment comes in, I'll photograph what I got so you can see. The new Occasions catalog is the best they've come out with in awhile, so be sure to check it out. (BTW, I'm not a demonstrator--just a happy customer!)
Wednesday, January 14, 2015
FROM THE SCRAP DRAWER--#43
I can't believe how many cards have been made just from leftover pieces from other projects!
This one started with a strip of dsp applied to the left side of the card and trimmed to fit. Next I added the embossing on the right side. The fern was already water colored on a piece of watercolor paper, so I fussy-cut it and used it as a background for the flower I stamped on vellum. After stamping the flower and heat embossing it with clear ep, I colored the back to coordinate with the colors in the dsp. Then I mounted it to the fern with a glue dot.
I stamped the sentiment on white cs and taped it across the top at the same angle as the printing in the dsp. Finally, I added some Stickles to the flower and put it on display on my window sill...another easy card!
This one started with a strip of dsp applied to the left side of the card and trimmed to fit. Next I added the embossing on the right side. The fern was already water colored on a piece of watercolor paper, so I fussy-cut it and used it as a background for the flower I stamped on vellum. After stamping the flower and heat embossing it with clear ep, I colored the back to coordinate with the colors in the dsp. Then I mounted it to the fern with a glue dot.
I stamped the sentiment on white cs and taped it across the top at the same angle as the printing in the dsp. Finally, I added some Stickles to the flower and put it on display on my window sill...another easy card!
Tuesday, January 13, 2015
ANOTHER SPRING FLORAL CARD
I discovered this strip of leftover dsp and the coordinated flowers in my stash and made use of both on this one card.
After attaching the strip down the middle, I embossed the borders and added the embroidery floss on the left. The flowers had been pre-stamped in purple (not a match!) so I went over the image with colored pencils to change the shade. The oval was then mounted with dimensionals.
With this card, I discovered that I could stamp something in a soft shade of ink and then add deeper shades with colored pencils later for a nice combination.
After attaching the strip down the middle, I embossed the borders and added the embroidery floss on the left. The flowers had been pre-stamped in purple (not a match!) so I went over the image with colored pencils to change the shade. The oval was then mounted with dimensionals.
With this card, I discovered that I could stamp something in a soft shade of ink and then add deeper shades with colored pencils later for a nice combination.
Monday, January 12, 2015
IT MAY NOT BE SPRING OUTSIDE, BUT...
...IT'S BEGINNING TO FEEL LIKE SPRING IN THE TOWER!
With record cold temps outside, I've been pulling out lots of floral stamps to brighten the days. This one is from a hostess set I earned a while back. I think the secret of making cards that look "together" is to resist the temptation to over-embellish. A few coordinated sequins was all this card needed for a little sparkle.
After coloring in the leaves and flowers with colored pencils, I fussy-cut the image and mounted it on the die cut panel with foam tape. The sentiment was stamped on a scrap of the same paper as the card base and applied to the front with ds tape.
Easy!
With record cold temps outside, I've been pulling out lots of floral stamps to brighten the days. This one is from a hostess set I earned a while back. I think the secret of making cards that look "together" is to resist the temptation to over-embellish. A few coordinated sequins was all this card needed for a little sparkle.
After coloring in the leaves and flowers with colored pencils, I fussy-cut the image and mounted it on the die cut panel with foam tape. The sentiment was stamped on a scrap of the same paper as the card base and applied to the front with ds tape.
Easy!
Sunday, January 11, 2015
SOME THINGS OLD ARE NEW AGAIN
Now that Christmas card-making is over, the tree punch has become a flag punch just by cutting off the trunk. This gate card made use of some of the many scraps in my collection.
When open, the dark blue cs inside provides contrast for all the white on the front. Below the greeting, I added "Just think, you're not as old as you will be next year!" This card will go to someone with a good sense of humor.
Next time you want to make a banner, just pull out your tree punch!
When open, the dark blue cs inside provides contrast for all the white on the front. Below the greeting, I added "Just think, you're not as old as you will be next year!" This card will go to someone with a good sense of humor.
Next time you want to make a banner, just pull out your tree punch!
Friday, January 9, 2015
A HAPPY RAINBOW
When I saw the resist paper in the SU Sale-a-bration catalog, I had to try the same technique on some similar dsp in my stash--and it worked! (SU will not be happy about that...)
I kept the card simple to let the colors take center stage.
Thursday, January 8, 2015
STAIR STEP BIRTHDAY CARD
Today is my son's birthday, and I made this card using some argyle dsp, a Greenhouse Society stamp of winter branches and 2 sentiment stamps. Since I colored the berries orange, I carried the same color through in the cs, gems and ink for a masculine look.
The base is white cs cut at 4 1/4" x 11" and scored at 1&1/4", 2&1/2", 4&1/4", 8&1/4" and 10&1/2" to form the steps and a half inch piece at the back to keep it upright. For mailing, I used my enveloper to make a 5" square envelope. (To fit into a standard A2 envie, just trim the top square slightly.)
Star Dust Stickles was added for the "snow" on the branches and also on the bee's wings.
The base is white cs cut at 4 1/4" x 11" and scored at 1&1/4", 2&1/2", 4&1/4", 8&1/4" and 10&1/2" to form the steps and a half inch piece at the back to keep it upright. For mailing, I used my enveloper to make a 5" square envelope. (To fit into a standard A2 envie, just trim the top square slightly.)
Star Dust Stickles was added for the "snow" on the branches and also on the bee's wings.
Wednesday, January 7, 2015
ANOTHER BUTTERFLY
This card was made with the large butterfly die in the SU! Sale-a-bration catalog. The paper used is a dsp also featured in the catalog and some lightweight vellum. The wings "flutter" as you move the card, a nice effect.
The blue background and gems are from my stash. It's always great when colors match, especially when from different sources.
This was so easy to make, it could have been a "simple Saturday" card!
The blue background and gems are from my stash. It's always great when colors match, especially when from different sources.
This was so easy to make, it could have been a "simple Saturday" card!
Tuesday, January 6, 2015
IS IT SPRING YET?
Using a scrap piece of dsp and a die cut butterfly, I put together this Spring-like card for a winter birthday. The die used is one of a set featured in the new SU! Sale-a-bration catalog. The greeting is stamped with Mowed Lawn Distress Ink. Inside will read "Always maintain a kind of summer even in the middle of winter."
As I post this, it is 15 degrees and snowing, so I guess it's not Spring yet :)
Wednesday, December 31, 2014
Tuesday, December 30, 2014
WINTER BIRTHDAY
This card was made with last year's Greenhouse Society stamp for January, one of my favorite winter stamps. It's so simple--all I did was stamp it on white with Versafine Smokey Gray ink, color the berries with an orange marker, and sponge the edges. After mounting it on the card, I added some Stickles Diamond for the snow on the branches.
The greeting is from a new Verve Stamps set that has 9 additional sayings to finish the wish. This one has "a very happy birthday" on the inside.
Sunday, December 28, 2014
I'M BACK!
I hope you all had as wonderful a Christmas as I did! It was great having the whole family here to exchange gifts and sit around the extended table for a ham dinner--13 of us, including my 96-year-old Dad and our 4 grandchildren. Everything got done in plenty of time: the shopping, cleaning, gift wrapping, decorating, cooking and mailing out of the 100+ cards I made!
Now that my stamping break is over, here's the card I made today for the first birthday of the year on January 2. The dsp and glitter star were on my table (so why not use them) along with Cornflower Blue Archival Ink which matches the dsp perfectly. To keep the silver twine in place, I first made a tiny notch at the top and bottom of the card front, something I plan to continue from now on.
Have you seen the Sale-a-bration catalog from SU! yet? It's fabulous! I'm looking forward to spending the gift certificate I got for Christmas at my upcoming SU! party!
Now that my stamping break is over, here's the card I made today for the first birthday of the year on January 2. The dsp and glitter star were on my table (so why not use them) along with Cornflower Blue Archival Ink which matches the dsp perfectly. To keep the silver twine in place, I first made a tiny notch at the top and bottom of the card front, something I plan to continue from now on.
Have you seen the Sale-a-bration catalog from SU! yet? It's fabulous! I'm looking forward to spending the gift certificate I got for Christmas at my upcoming SU! party!
Saturday, December 13, 2014
Monday, December 1, 2014
INCHIES!
I've enjoyed using this color scheme, especially for a snowy image. I white-embossed it on navy cs, then cut it to size. The squares used here are 2" each, mounted on a navy panel 2 1/4" x 4 1/2", then a larger gray rectangle and a creamy textured base. The white and navy embroidery floss finishes the look while keeping it simple.
The stamp is a large Penny Black scenery stamp (Heaven on Earth) which I've used many times before, but not for an inchie card. (Click on the photo for a closer look.)
Saturday, November 29, 2014
THREE OF A KIND--Winter Fenceline
This stamp set from Serendipity Stamps has been a pleasure to use, either for winter cards as shown here, or Autumn cards. I can imagine it in summer mode with green sponging over the branches and green grass below.
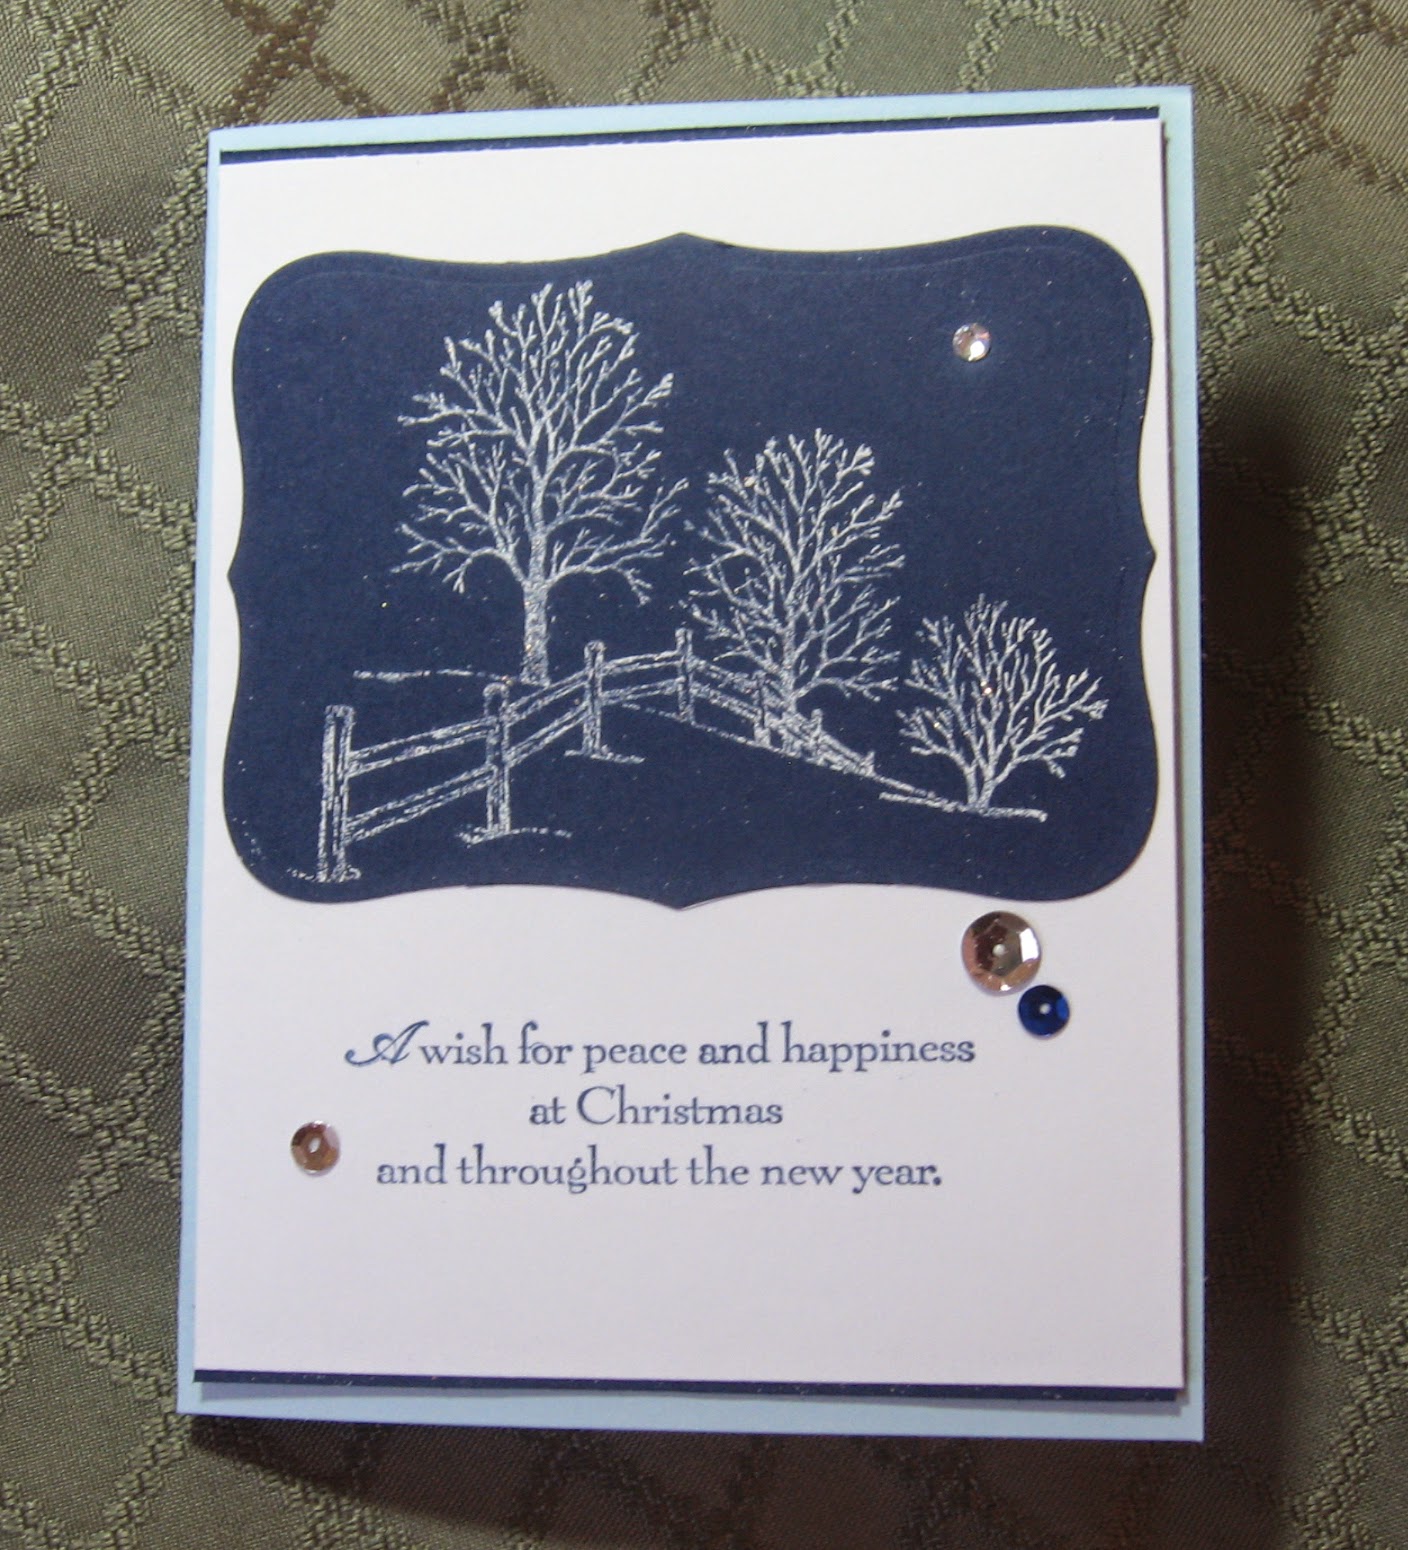
This first card was stamped on Night of Navy with a blend of white ep and glitter that I mixed myself. After die cutting it, I glued it to a white panel and added strips of leftover Night of Navy on the top and bottom. The greeting is from a SU set.
The second and third cards were stamped with Versafine warm gray and sponged with Distress inks for the sky. All I had to do next was hand write "peace" and fill in the fence with two shades of brown markers. A little bit of Stickles Ice on the hill line and bottom of the fence posts finished it off.
For this last one, I die cut a gray tree, then added some brown marker "bark" and glued it to the side of the card. This time I stamped "peace" and sponged the oval before mounting it to the card with a dimensional.
To give it some depth, I mounted the fenceline scene to the back of the opening with dimensionals.
These three are extras that I added to the Christmas cards I plan to mail next week--over 100 of them!
This first card was stamped on Night of Navy with a blend of white ep and glitter that I mixed myself. After die cutting it, I glued it to a white panel and added strips of leftover Night of Navy on the top and bottom. The greeting is from a SU set.
The second and third cards were stamped with Versafine warm gray and sponged with Distress inks for the sky. All I had to do next was hand write "peace" and fill in the fence with two shades of brown markers. A little bit of Stickles Ice on the hill line and bottom of the fence posts finished it off.
For this last one, I die cut a gray tree, then added some brown marker "bark" and glued it to the side of the card. This time I stamped "peace" and sponged the oval before mounting it to the card with a dimensional.
To give it some depth, I mounted the fenceline scene to the back of the opening with dimensionals.
These three are extras that I added to the Christmas cards I plan to mail next week--over 100 of them!
Friday, November 28, 2014
THIRD THURSDAY TECHNIQUE CLASS
I've been attending a technique class at Cyndy's house, my SU demonstrator, (for several years now) on the third Thursday of the month. This card was a way to use the Festival of Trees set and coordinating punch featuring 3 different trees on one card. Nothing tricky this time, just a nice quick card in a mod color combo. I've been seeing a lot of these colors online this year, and they're a refreshing change from the traditional red and green.
TIP: To make a tree smaller (as shown here in the glimmer paper) using the tree punch, simply punch the tree out, reinsert it partway and punch again. Thanks for showing us that, Cyndy!
I'm continually amazed at how versatile this set has been. I've used it exclusively for the past 11 weeks at Mothers Class without repeating a design. Plus, I've made a few more at home.
TIP: To make a tree smaller (as shown here in the glimmer paper) using the tree punch, simply punch the tree out, reinsert it partway and punch again. Thanks for showing us that, Cyndy!
I'm continually amazed at how versatile this set has been. I've used it exclusively for the past 11 weeks at Mothers Class without repeating a design. Plus, I've made a few more at home.
Wednesday, November 26, 2014
HAPPY THANKSGIVING!
Time to celebrate our blessings and give thanks for having so many of them. Stay safe in stormy weather and don't eat too much!
MOTHERS CLASS CARDS
Last week in class, Jackie brought materials to make these cute mitten cards with the fold at the top. It was fun being a student for a change!
For my card, after adding the dsp, thumb tip and cuff to the plain white card provided, I ran the top piece through the cuttlebug with a snowflake ef. The bow was a die that I ran through the cb and attached with a glue dot. The snowflake and gem gave it that final touch. Every card was different, thanks to all the choices we had in dsp; and all were adorable.
For the second card, I brought one that was quick and easy for the class to do after finishing their mitten cards. First, we laid the stamp upright on the table, inked it with Versafine Smokey Gray, and pressed the white cs on it.
After trimming down the image (I purposely cut the white cs larger than needed to make it easier) we used colored pencils on the evergreen tree and the deer. We mounted the image on the green cs, and dimensionals were used to pop it up on the kraft cardfront. Once the snowflake and gem were added, the cards were done in less than 15 minutes!
We decided afterward to cancel today's class since it would be the day before Thanksgiving. Now that it's snowing (5 inches already!) it seems we made the right decision. Next week's class will be our last for 2014, a stamp-a-stack of 5 Christmas cards.
For my card, after adding the dsp, thumb tip and cuff to the plain white card provided, I ran the top piece through the cuttlebug with a snowflake ef. The bow was a die that I ran through the cb and attached with a glue dot. The snowflake and gem gave it that final touch. Every card was different, thanks to all the choices we had in dsp; and all were adorable.
For the second card, I brought one that was quick and easy for the class to do after finishing their mitten cards. First, we laid the stamp upright on the table, inked it with Versafine Smokey Gray, and pressed the white cs on it.
After trimming down the image (I purposely cut the white cs larger than needed to make it easier) we used colored pencils on the evergreen tree and the deer. We mounted the image on the green cs, and dimensionals were used to pop it up on the kraft cardfront. Once the snowflake and gem were added, the cards were done in less than 15 minutes!
We decided afterward to cancel today's class since it would be the day before Thanksgiving. Now that it's snowing (5 inches already!) it seems we made the right decision. Next week's class will be our last for 2014, a stamp-a-stack of 5 Christmas cards.
Saturday, November 15, 2014
TWO OUT OF THREE
NOTE: Although it doesn't look it here, both these cards were done with the same colored pencils and match their red backgrounds perfectly.
I originally started out to make three cards with this new image from the Greenhouse Society (Technique Tuesday.) However, one of the images came out blank in the middle and would have been unusable had I not layered it with the other.
The red petals were done with three shades of red. The leaves were done with three shades of green and a brownish red. Several months ago, I took a class on colored pencils during which I learned to add the red (or maroon) to leaves and stems for shading. I never would have thought that would work, but I really like how it makes the leaves more realistic.
The second card is the layered one, popped up with dimensionals. The gold twine was wrapped around the panel three times and taped down on the back. The bow was added with a glue dot on the front, a "sneaky" way to make it much easier.
Using colored pencils is a relaxing form of coloring images. It's also very transportable, either when going on vacation or just out to the deck on warm, sunny days. I love to stamp images on white cs and take them with my colored pencil tin to a quiet spot!
I originally started out to make three cards with this new image from the Greenhouse Society (Technique Tuesday.) However, one of the images came out blank in the middle and would have been unusable had I not layered it with the other.
The red petals were done with three shades of red. The leaves were done with three shades of green and a brownish red. Several months ago, I took a class on colored pencils during which I learned to add the red (or maroon) to leaves and stems for shading. I never would have thought that would work, but I really like how it makes the leaves more realistic.
The second card is the layered one, popped up with dimensionals. The gold twine was wrapped around the panel three times and taped down on the back. The bow was added with a glue dot on the front, a "sneaky" way to make it much easier.
Using colored pencils is a relaxing form of coloring images. It's also very transportable, either when going on vacation or just out to the deck on warm, sunny days. I love to stamp images on white cs and take them with my colored pencil tin to a quiet spot!
Monday, November 10, 2014
CHRISTMAS STAMP-A-STACK
This is the card I designed for our last Mothers Class the first week in December. It's easy to assemble and should make a nice finale for our Fall sessions.
The top-fold card base is Always Artichoke, the die cut window is white cs, and the tree is stamped on light green cs and punched out. The bottom corners are rounded.
To make the tree sparkle, I brushed it with a light coating of TomBow mono glue and sprinkled it with Sugar Coating glitter. You can see how much it glistens in the sunlight in the photo below. The star is punched from silver glitter paper and attached with a glue dot. The tree is mounted with SU dimensionals, and three rhinestones were added for balance.
The inside greeting will be stamped on printer paper with Versafine Olympia Green ink. After rounding the bottom corners, it will be attached with snail.
This year's class has been a lot of fun, and I look forward to reconvening in February. Hopefully, the worst of winter will be drawing to a close by then!
Labels:
Christmas Cards,
Mothers Class,
Stampin' Up,
Workshop Designs
Thursday, November 6, 2014
TISSUE BOX CHRISTMAS TREE
(See previous post first.)
One last scrap becomes a tree! This one was decorated with red gems and a glittering gold star. A little gold twine and some shiny sequins give this card a bright finish.
What will the next tissue box bring???
TISSUE BOX CHRISTMAS CARD
If you shop at Weis Markets, you might recognize the floral design from their tissue boxes. After pulling up the last tissue in the box, I thought it would be a waste to throw it away (the box, that is!); so I used the side panel for the die cut on this card.
After stamping the poinsettia twice and cutting down one of them to pop up on the top, I painted the flower with Twinkling H2O's. Then I layered the red one over the green with SU dimensionals, added yellow Stickles in the center and attached it to the card with dimennsionals.
Recycling at its best!
Wednesday, November 5, 2014
ORNAMENTAL PINE BACKGROUND
I've made a lot of cards featuring the Ornamental Pine set, but this time I wanted to try using it for a background. The chickadee from Our Daily Bread Designs came with a coordinating die, which makes it easy use in a variety of ways.
First I stamped the pine bough a few times along the side of the panel, then ran it through my Cuttlebug with the stitched rectangle die. After stamping the bird and coloring it with colored pencils, I used the matching die. I cut away some unwanted branches before mounting it to the panel with dimensionals. I added the greeting and used TomBow glue to attach both panels to the gray card.
Very easy to do!
First I stamped the pine bough a few times along the side of the panel, then ran it through my Cuttlebug with the stitched rectangle die. After stamping the bird and coloring it with colored pencils, I used the matching die. I cut away some unwanted branches before mounting it to the panel with dimensionals. I added the greeting and used TomBow glue to attach both panels to the gray card.
Very easy to do!
Tuesday, November 4, 2014
PINECONE WREATH
When I saw this design (in more than one place) I knew I had to give it a try!
Using Colorbox Chestnut Roan ink, I stamped the pine cone at 12, 3, 6 and 9 o'clock. Then I went around again in between the first four after stamping off on a piece of scrap paper. For more of a color variation, I switched inks to an Adirondack Rainbow pad, Woodlands. Keeping to the left side of the pad (the browns) I continued around the wreath, stamping twice without re-inking each time.
I'm amazed at how easy this was the first time around! I finished by adding the jute bow and greeting. Finally, I used Diamond Stickles on the pine cones to give it some sparkle.
For the Klass-y wreath which inspired me most, click HERE.
Thanks, Bonnie!
Using Colorbox Chestnut Roan ink, I stamped the pine cone at 12, 3, 6 and 9 o'clock. Then I went around again in between the first four after stamping off on a piece of scrap paper. For more of a color variation, I switched inks to an Adirondack Rainbow pad, Woodlands. Keeping to the left side of the pad (the browns) I continued around the wreath, stamping twice without re-inking each time.
I'm amazed at how easy this was the first time around! I finished by adding the jute bow and greeting. Finally, I used Diamond Stickles on the pine cones to give it some sparkle.
For the Klass-y wreath which inspired me most, click HERE.
Thanks, Bonnie!
Monday, November 3, 2014
Sunday, November 2, 2014
TEXTURED WISHES
Ever finish a card and feel like it needs "something" for a final touch? That's what happened here.
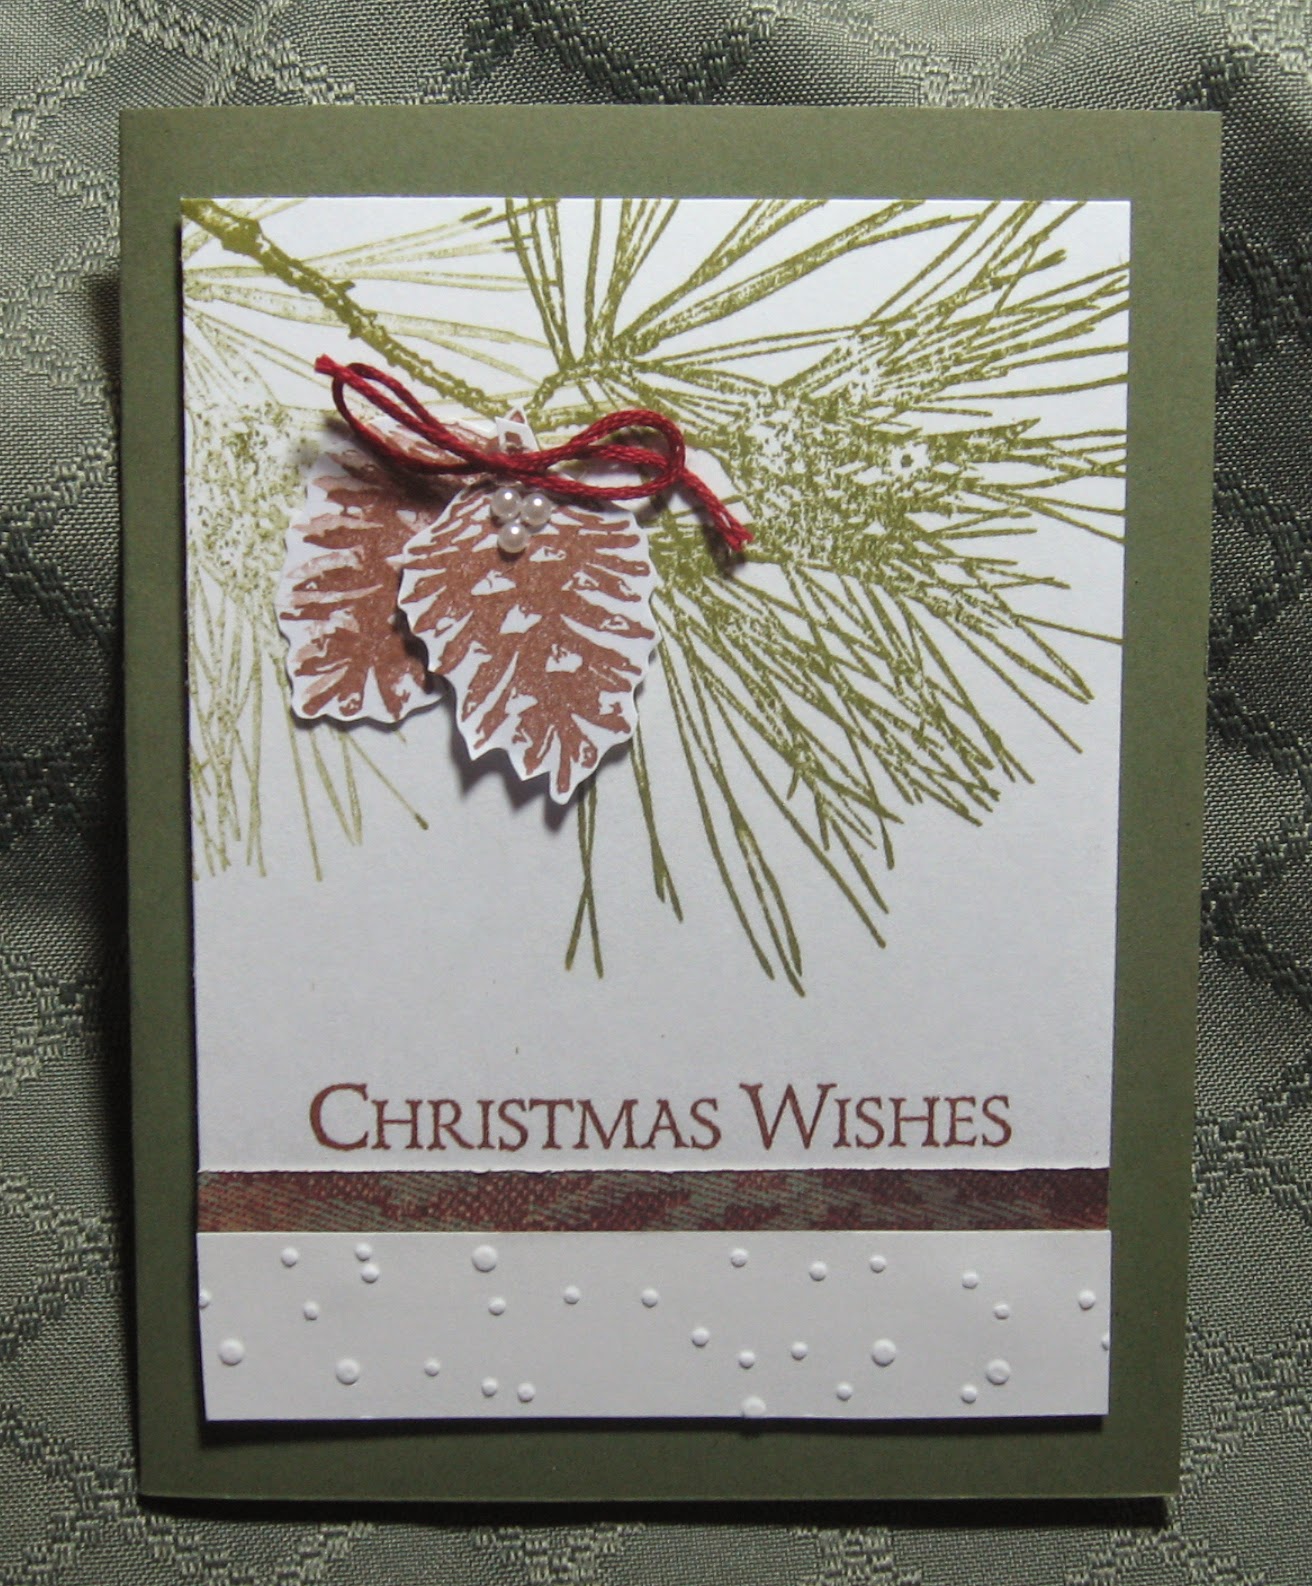
After stamping the pine branches and fussy cutting the two pinecones, I added the bow and greeting; but there was too much dead space at the bottom. At first, I added the thin strip of dsp which had the same color red as the bow. It still needed "something" however, but what???
Then I spied a piece of embossed cs that someone sent me ages ago (Bonnie, I think) and added it to the bottom. As Frenchie would say (on YouTube) "voila!" It was done!
TIP: Sometimes, all a card needs is a little texture to give it interest without distracting from the simplicity of the card.
After stamping the pine branches and fussy cutting the two pinecones, I added the bow and greeting; but there was too much dead space at the bottom. At first, I added the thin strip of dsp which had the same color red as the bow. It still needed "something" however, but what???
Then I spied a piece of embossed cs that someone sent me ages ago (Bonnie, I think) and added it to the bottom. As Frenchie would say (on YouTube) "voila!" It was done!
TIP: Sometimes, all a card needs is a little texture to give it interest without distracting from the simplicity of the card.
Saturday, November 1, 2014
Subscribe to:
Posts (Atom)