Friday, February 28, 2014

Inside and Out--Online Classes

Did you know that you could sign up for any of the previous Hero Arts online classes?  I just started the one for Inside a card, and it's cheaper (and better) than buying a magazine!  Plus, you get videos by instructors like Jennifer McGuire, Kristina Werner and Julie Ebersole that make each technique super clear.


The first lesson was on different ways to make pop-ups on the inside, which inspired this card.  The video shows 3 ways to use a small cube on which to mount an image.  Since the card base was too dark for writing a message inside, I chose to use a white insert instead; but the idea is still the same.  As you can see, the inside is a continuation of the theme on the front.  These online classes are so helpful!

NOTE:  The online class title is "Insider."


Thursday, February 27, 2014

GREENHOUSE SOCIETY--Peony

If you love botanicals as much as I do, check out the Greenhouse Society stamp sets HERE at Technique Tuesday.  Membership entitles you to automatic monthly delivery of their beautiful stamp sets at a discount.

This was the set for January, and I used it for a shaker card with tiny green beads and purple flakes.  The greeting is also part of the set.

Enjoy!

Thursday, February 20, 2014

SIMPLE THANKYOU CARD

Our pastor most likely could use a few thank you notes, so I added this to his next batch of cards

After sponging a stencil with Hero Arts Pool ink, I ran the card front through the CB with this thanks ef.  Then I cut the oval with a Nestabilities die and set both aside.

Since I had the Morning Meadow set out, I stamped the blank scrolled  image in pool ink, then stamped the thank you in the center with a darker blue ink.  Next I fussy cut the image, mounted it on the oval with dimensionals and attached it to the card front with glue dots.  Finally, I rounded all four corners.

Easy!

FROM THE SCRAP DRAWER #36

In keeping with my self-imposed challenge to use only what I already have in my stamping tower for the rest of the year, I came upon this barely used SU Hostess set.  Actually, I have five newer Hostess sets all together.  So why would I NEED to buy more???  Well, "need" is definitely a relative term in stamping!

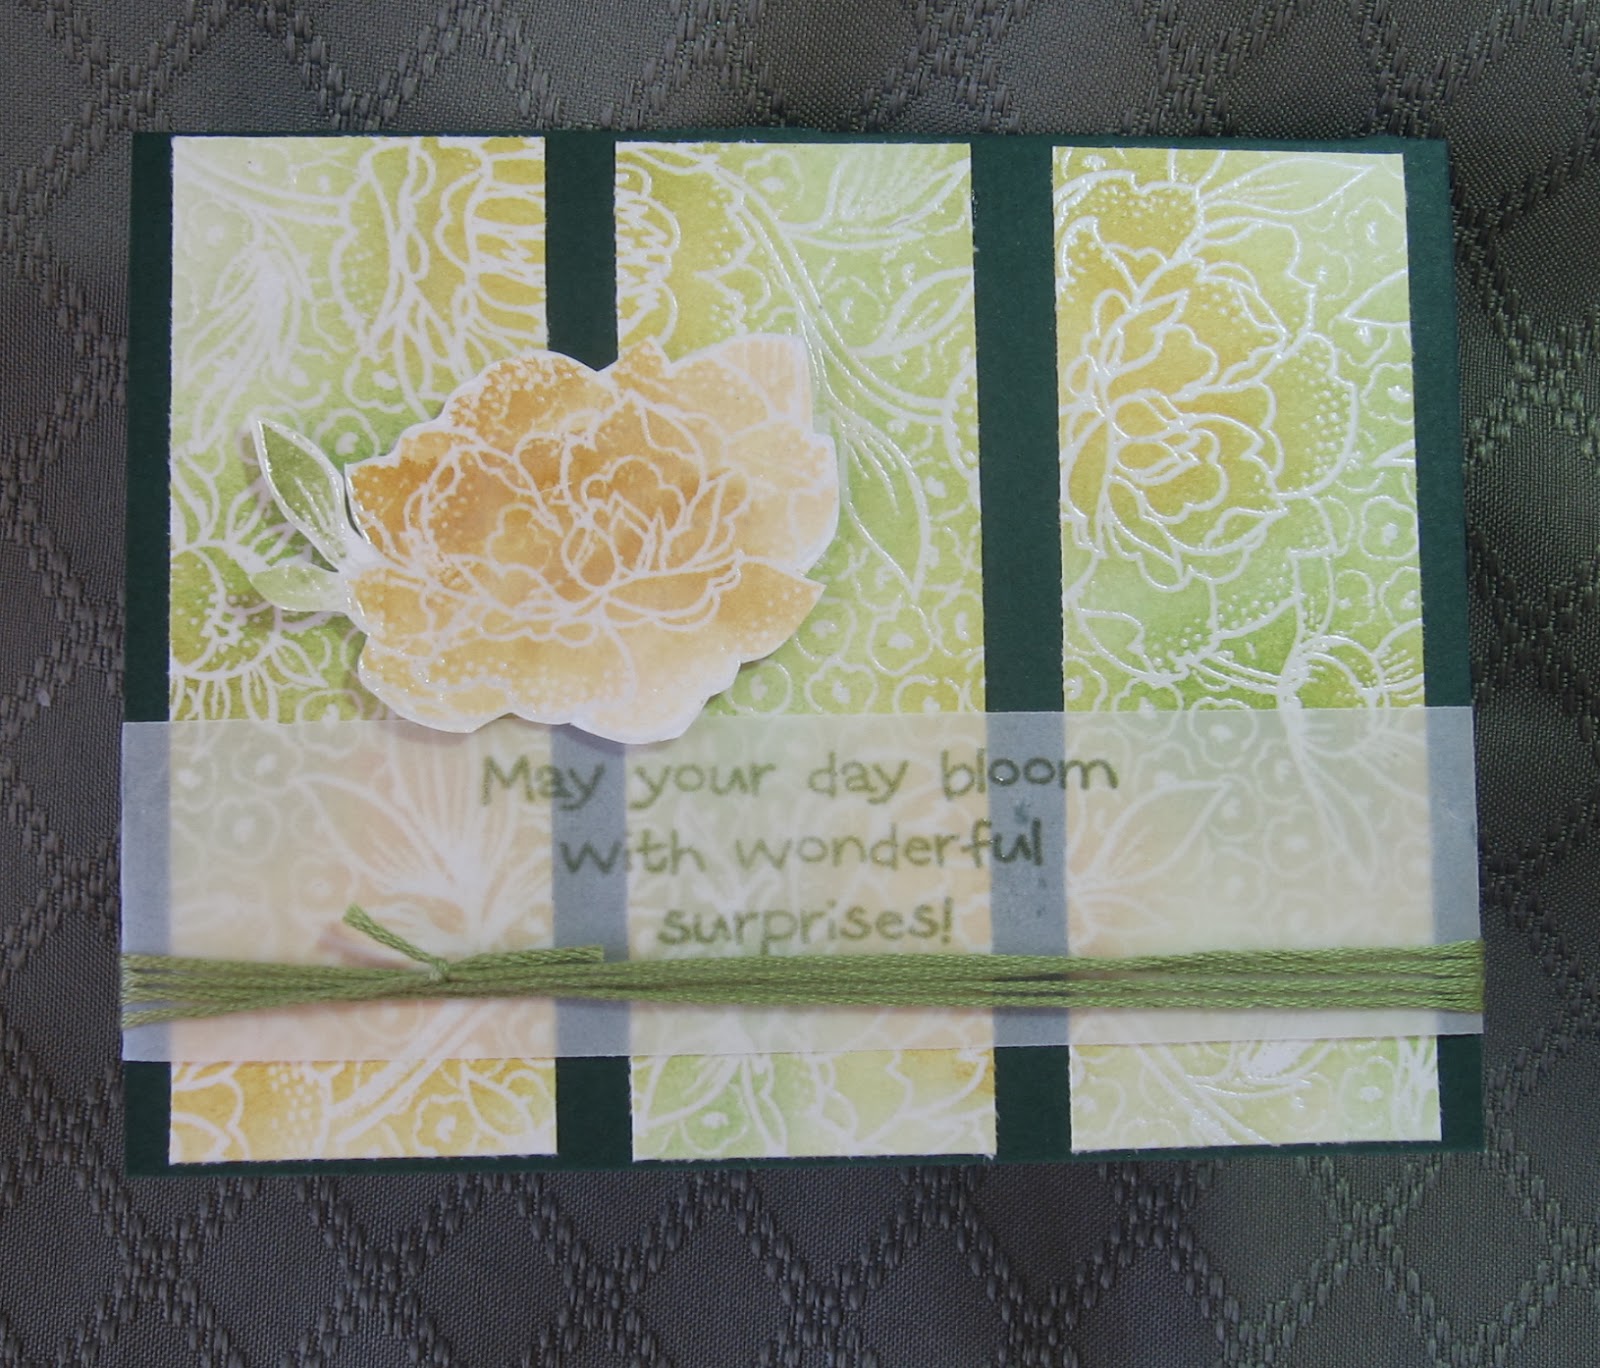
This was fun to make as I pulled out all the scraps.  First I inked up the French Script background stamp with Pumice Stone Distress ink, stamped off lightly and stamped it on a scrap of white cs for a faint background.  Next I stamped the floral image from Simply Soft with "full strength" pumice stone ink.  For the blossoms (this is a two-step set) I used an Eggplant Purple dye ink that I've had in my stash for at least 10 years!  It was still surprisingly juicy enough for a clear image and birthday greeting.

In my dsp collection, I found just the right color purple and green pieces to use (as shown) to highlight the flowers without overpowering them.  I colored the stems with a Mellow Moss marker and mounted the panel to a mellow moss scrap of textured cs, which I also used for the greeting.  For the final touch, I brought out the gems and embroidery floss, attaching all as shown.

Although this has been quite a challenge -- and it's only February -- I'm amazed at how much I have at my disposal, even after the last few purges and giveaways!


If you'd like to join me in my "stamping diet" challenge, see the post on January 19th. 

Monday, February 17, 2014

THREE OF A KIND--Oval Frame

 It's been awhile since I've done three of a kind for the blog, so I thought I'd have a go at it with the SU  frame ef.


This first one is stamped with Distress inks and sprayed with water for the watercolor effect.  The leaf is a stamp and matching die from Impression Obsession; and the flowers are from a SU hostess set, "Morning Meadow".  I used the coordinating punch for the flowers.  The tiny pearls go along with the raised dots around the frame.


The second card uses the poppy stamp from another SU hostess set, "Simply Sketched" and is the first time I've used it.  The greeting and flower are stamped in Versafine Smokey Gray ink to match the gray cs.  I kept this one very simple, adding just some tiny black gems and a black embroidery floss bow.

The last card uses a daisy die cut which I water colored and added Stickles to.  The greeting is stamped in Versafine Olympia Green ink.  I added a green strip and just a few embellishments to finish it off.


Are you as eager for Spring as I am????

Sunday, February 16, 2014

WATERCOLOR BIRTHDAY CARD

After watching Julie Ebersol's video, I just had to give her design a try.  For the background, I applied Tumbled Glass, Broken China, Peeled Paint and Wild Honey Distress inks onto an acrylic block.  Then I applied the colors on a heavy cardstock panel with my aqua painter.

Next, I used a tiny flower peg stamp with the same blue inks to continue the watercolor look.  For the birthday message, I stamped the typewriter from the SU "You're My Type" set with Versafine Smokey Gray ink.

To finish, I attached the panel to an olive green textured cs with double stick tape and mounted it to the card front with dimensionals.  For the final embellishment, I added three small sequins.  Done!

Thursday, February 13, 2014

Valentine Wildflowers

This is one of  the Valentines I sent out this year.  After taking the internet class on stenciling last month, I made the heart stencil using a punch and a piece of cardstock.  Then I sponged red ink over it onto the white panel and stamped the flowers and verse over it.

Before adding color to the flowers with colored pencils, I trimmed the panel to size, rounded the corners and mounted it to the blue cs with TomBow Mono glue.  The smaller flower was added from my collection to give it a little sparkle, and  yellow Stickles was used for the centers of the other two blossoms.   While waiting for the Stickles to dry, I ran the card base and embossing folder through my Cuttlebug and stamped the sentiment on the inside.

Happy Valentine's Day everyone!

Secret Message Thank You


Here we are in the midst of yet another huge snow storm--a good time to stamp!

This secret message card is for someone who sent me a lovely Valentine card.  The base card is kraft, but the front panels are a light green.  The flowers are colored to look more like poppies than daisies.
 When the card is first opened, you see the back of the front square, which is why I used red  for the flowers.  The white boxes are for the letter I'm writing.  Although it's hard to see here, there are snow flakes stamped in white on the kraft rectangles.
Once opened up to reveal the secret message, there are flowers stamped with peg stamps on the kraft pieces.  The white rectangles are used for the words of encouragement hand written in green.

For instruction on how to open the card (or make it) just go to Utube or Google and type in secret message card.  Lots of them will come up!

Opening the card is so simple once you know the trick.  Enjoy!

(Click on photos to enlarge.)

Wednesday, February 12, 2014

Special Card for a Special Friend

If I ever get out of my driveway to go to the Post Office, I'll be mailing this card to someone special who sent me a batch of these falling heart panels.  Somehow, I opened the card when it came (I can't even remember when) and set it aside.  I guess I got distracted after that and the envelope got mixed in with other papers until today.  What a happy discovery!

Thank you, Kim.  I hope you like the card and know that I truly appreciate your thoughtfulness.

Friday, February 7, 2014

Spinner Valentine Card

Interactive cards are always such fun!  To "set" the spinner before mailing, just blow on one side of the circle, then stop it with your finger and put it in the envelope.  When the recipient opens the card, the circle will spin automatically.

Meanwhile, you can play with it for awhile before sending it... *wink*  Watch out--it's addictive!


(See previous post for a birthday version of the same design.)

Thursday, February 6, 2014

Fabulous Floret ala Brandy Cox


 If you haven't discovered Brandy Cox's videos on Utube, you are really missing out!  This card is patterned after her gorgeous butterfly card, with some variations of my own.  First of all, mine is a side fold; hers is a top fold.  One advantage of the side fold is that you don't have to remember to place the inside image upside down so that it's right side up when you open the card.  I wish I could say I brilliantly thought that up on purpose, but it was because I forgot to make it a top fold.  However, from the front they both look similar in design.

Next, in order to have some contrast between the floral circle and the white cs on the inside, I added the green circle that was die cut from the front so that it would be directly behind the flower opening.  Once I did that, the flower just popped!

For instructions and video, just go to Utube, type in Brandy Cox and look for a yellow butterfly card..  Then sit back and enjoy!

Wednesday, February 5, 2014

CASEing the iPad #10

With all the snow and ice we've been getting lately, is it any wonder I keep choosing green for my cards???

This one was inspired by Splendiferous Creations HERE.  Lisa Somerville does beautiful work!

Using a stencil buried deep in my stash no longer, I sponged two shades of green and one yellow of Distress Inks, blending the colors as I worked my way down the card.  The message is white embossed on a scrap of tinted vellum (green, of course!)  The square at the top of the tag is silver metallic, although it looks gray here.  After decorating the tag, I mounted it to the stenciled piece with a craft glue dot at the top and then mounted the panel to the card with dimensionals.

I'm looking forward to seeing some green grass again SOON!

CASEing the iPad #9

I haven't CASEd (CopyAfterSomeoneElse) in quite awhile, but since I'm stuck in my house during the latest round of winter storms...

This is one of those cards that looks better IRL than here.  (My card isn't quite so yellow.)  Although mine turned out quite a bit different than the one I copied, I still like it.  If you'd like to give it a try yourself, check out the Cardography blog HERE.

Thanks Therese for the inspiration!

Sunday, February 2, 2014

HEARTS AND FLOWERS

Love those scraps!  They all happened to match beautifully (the hearts panel isn't as red as it looks here.)  I ran the punched white heart through a floral Cuttlebug embossing folder and added another white flower on top.  The gem under the "you" is a heart shaped one, and the pink heart in the "O" is also popped up with a dimensional.

Next stop:  Super Bowl (on TV!)