Sunday, February 28, 2010

SIMPLE SATURDAY #15


Here are six cards made from recycled store-bought cards in five minutes or less! Please leave a comment and let me know which one you like best. Here are the deets:

The first thankyou card was simply cut apart and attached to the new cardstock, except that I rounded the top corners on the "thank you" piece. Inside, I cut out the sentiment from the original card, punched a little heart next to it, mounted it with double-stick tape and covered the tape (through the punched heart) with blue glitter.

The baby card was even simpler. At first, I considered coloring the image; but it matched the gray cs I had so well, I decided to keep it gender neutral with the yellow. All I had to do was add the embroidery floss, Hero Arts flower and yellow button.

The birthday card took some SU dimentionals and a striped card from the dollar store. Inside, I used my oval scallop punch to remove the sentiment from the original, and mounted it on red cs inside.

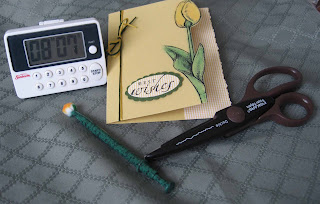
The tulip thankyou was first cut off the front and remounted on kraft cs after adding the gold twine. I colored the tulip with chalks to finish it off.

The green card took the most "work" using my oval punch to start. The flowers from the original card were inserted through a punched flower at the base and tied with sheer ribbon. Another piece of the original was punched for the scalloped edging at the bottom, all of which was mounted to the green on lilac cs. The greeting was stamped at the bottom to balance it out.

Finally, the easiest one of all. After cutting the orchid cardfront to size, I mounted it on light green cs. Amazingly, the orchid color perfectly matched the Rich Razzleberry cs I had just opened the other day! After mounting it on the card front, I added some Stickles to the center of the flower for a little sparkle.

I hope this post will encourage you to get out some of your old cards and recycle them!

Saturday, February 27, 2010

FREE AT LAST!


Now that our driveway has been cleared of over two feet of snow, I was eager to get on the road and explore the outside world again. Joyce and I went for lunch at the Runway Cafe where I snapped this photo of a plane taking off over an idle glider. It'll be awhile before anyone is soaring!

Friday, February 26, 2010

NEW STAMPS


It may be winter outside, but it's Spring in the Stamping Tower!

First, from Hero Arts, is a card made with the Large Blossom cling stamp in white embossing on kraft cardstock. I added Nut Brown Flowersoft in the center and two Scor-Pal grooves on the left side with brown and white embroidery floss. The greeting below is stamped with Colorbox Chestnut Roan.

The crocus stamp on the second card is from a set by Gina K. After stamping in black and coloring with SU markers, I blended the purple with a Dove Blender Pen and added yellow Stickles to the blossoms. The ribbon is threaded through the oval and attached to the back of the green gingham cs. The knot was added later with a glue dot--so much easier that way! The sentiment is from the SU Abundant Hope set.

MAKE CARDS WHILE THE SUN DON'T SHINE!


Here's what we woke up to this morning, and it's still coming down. Actually, it's arriving horizontally! So far, we've had 18" which is 4" more than last time. At the rate it's snowing now, we'll probably have close to 2 feet.

UPDATE: The sun is shining, although more snow showers are predicted later. So far, we've had over 2 feet of snow! A backhoe arrived to clear the hill out front, but we're still waiting for our driveway to be plowed.

Meanwhile, things are warm and cozy in the Stamping Tower. I'm trying out some new stamp sets that came on Wed. Check back later for a look at the cards I'm working on now.

Thursday, February 25, 2010

DON'T THROW THOSE STORE-BOUGHT CARDS AWAY!


Last month, during our de-cluttering challenges, I asked the ladies at Bible Study to bring in any cards they received recently that are too nice to throw away. They did. I now have a whole box full!

Here's a card I made from the first card I pulled out of the box. All I had to do for this one was to cut it down to size, run the edges over my green ink pad, add the embroidery floss and stamp the greeting.

As I went through the first stack of cards, I used various punches and coordinating cardstock to make up kits for the first week of my Spring semester classes.

Both the Bible Study on Tuesdays and Mothers Class on Wednesdays will have the same topics each of the 8 weeks. The plan is to start with a brief Bible devotional on the topic for that week (get well, birthday, anniversary, sympathy, just a note, etc.) We'll then make cards to reflect the passage and mail them out as an encouragement to someone the same day. The first and last weeks, we'll make use of donated cards--the rest will be stamped in class using whatever materials I provide.

If you'd like to follow along, I'll put them all under the label for Mothers Class. How 'bout participating with us--it would be fun to have an Internet Extension! Just make a card similar to ours each week and leave a comment that links back to your blog. I'll show the class your creations on my laptop the following week. In other words, you'll see our cards first; then we'll see yours later. I hope you'll join us!

Meanwhile, I'd love to see some of your cards where you've re-used a store-bought card. If you're in the path of this latest snow storm, go for it!

Wednesday, February 24, 2010

SNOWY DAY FUN


Here are two new cards I made while the snow was falling. I needed a hint of Spring!

The top one features a pop-up butterfly made from the SU butterflies diecut and my Cuttlebug. The card front folds back for added interest.

The bottom one has a birthday message on an accordion fold hidden from view until the card is opened. The cupcake on the front was paper pieced, with Pistachio glitter for added sparkle on the "icing." The triangle cutaway was necessary because the cardstock had faded in the store--the package it came in has a triangle opening at the top so you can see the colors inside. Thankfully, only the top sheet was affected. (That's probably why it was on the half-price rack.)

I'm happy to be back into pastels and florals. How 'bout you?

Tuesday, February 23, 2010

DE-CLUTTER DE HOUSE (Seasonal Clothing)

This is a good time of year to clear the way for Spring clothing. Take a plastic bag and look through your closets and drawers for items you're willing to donate. When was the last time you wore ...................? (fill in the blank.) If it's been more than a year or two, consider dropping it into your local clothing drive bin for someone who really needs it and could use it now. What a guilt-free way to let go of unused (or unloved) clothing!

As for clothing we hope to wear again when we lose that extra weight, I finally decided that if I ever DO lose these extra 20 lbs., I deserve some new clothes to celebrate in! I no longer have too-small/tight clothes staring back at me from my closet. Meanwhile, someone, somewhere is enjoying clothes that fit...and I have a closet that all my clothing fits in.

Dresser drawers can be purged, too. Underwear, socks, nightgowns, pj's, sweatshirts, turtlenecks, etc. can be sorted and inspected. If it's not ship-shape, ship it out! Even the jewelry box on top of the dresser can be sorted out, and outdated or unloved costume pieces can be given away to friends or relatives who might enjoy them. (Just be careful not to give them back to someone who gave it to you!) Shown here is a necklace holder my Dad made using a piece of wood and some golf tees. He also made a smaller version mounted by the back door to hang our car keys.

Finer chains and necklaces can be moved from the jewelry box and stored in an inexpensive tackle box with small compartments to keep them from getting tangled. For organizing within drawers, try using dividers or containers to keep things together, especially small items like socks and underwear.

When it comes to children's bedrooms, set the example with your room and then help them do the same. Outgrown clothing or toys can be passed down to younger siblings or friends, if not donated to those in need. Take the opportunity to teach them to think of others less fortunate and help in their own way. Rearranging furniture can give new life to a room without having to spend money on decorating--AFTER all the clutter is removed!

Monday, February 15, 2010

CLEAN REFRIGERATOR!


Just wanted you to know that I practice what I preach!

It took me a couple of hours, shelf by shelf, to discard everything that had been pushed to the back and forgotten. Then, I removed, cleaned and rearranged each shelf or drawer for all the remaining items. Notice the bottom shelf on the right which is reserved for containers of leftovers later on. It really is nice to have a refrigerator with removable components so they can be thoroughly washed in the sink.

I took this photo so I'd remember what it's supposed to look like!

Saturday, February 13, 2010

Friday, February 12, 2010

INKADINKADO FLOWERS

This has to be one of my favorite sets, especially since they're clear stamps--so easy to use.

These 3 cards were done with the help of Basic Grey 6 x 6 dsp pads which I've had in my stash for quite awhile. The top two were done on watercolor paper and painted in with my aqua painter brush. The poppy below was stamped on white cs and colored with a SU marker. Stickles were added to each for added sparkle.

Which to you like best?

Thursday, February 11, 2010

The Blizzard Advantage


Thanks to this latest blizzard, I was able to de-clutter and really clean out the Stamping Tower like never before (and hopefully, never again :))

Last time I posted a redo of the Tower, the storage units were on the opposite wall; but I like this better because the room looks neater from the door.

Here's what's in all those drawers and containers, starting with the unit closest to the windows:

* the two white drawers contain ribbons in the top one and tools in the bottom one (such as Rollograph supplies, brayers, crimper, etc.)

* the three white containers on top hold, from left to right, SU punches, Marvy punches, and Slice machine with accessories

* next to the drawers are 2 stacked 3-drawer units holding, from top to bottom: glitters and Flower Soft, brass stencils and piercing tools, craft knives and other tools; then, peg stamps, the infamous scrap drawer and other odds and ends in the bottom drawer

* in the narrow space between the drawers and plastic units is the Score-Pal and a cutting pad

* below the drawers, from left to right on the shelves, are embroidery floss, chalks, glue dots, 3-hole punch, Xyron machine, colored pencils, & watercolor pads--all on the stacked paper trays; next are extra assorted markers, a mini 3-drawer unit with coloring tools, 2 sandwich containers with clear embossing powder in one and Prisma glitter in the other, then a stack of Little Sizzles dsp pads; the bottom shelf holds more containers of assorted embossing powders.

* the filing cabinet holds 12 x 12 dsp in the two top drawers, and a file drawer below. I love having the Cuttlebug on top where I can swing around in my chair to use it, which I do often.

* behind the cabinet doors are all the stamps/stamp sets presently in use--I moved out the seasonal ones to the closet where I rotate my supply with each holiday or season

* above the doors are more punches, a white basket of clear stamp sets, a wicker basket of stationery and envies and my SU marker set on the right

* on top are more dsp pads in the container on the left, a basket of Cuttlebug folders and dies, and a box of finished cards waiting to be used

* the wall shelves hold my card holder for displaying my faves, my ink holder, a black container of assorted bottles, a white basket of odds and ends (including a book of Common Birds for accurate bird coloring) and one last basket of Colorbox inks


* on the opposite wall is my table, which I can pull out into the room when stamping buddies come. The beige placemat covers stamp sets and papers to protect them from sunlight damage. Everything else on the table is pretty self-explanatory. I enjoy the "inspiration" prints on the narrow shelf above it; plus I also face the street which I can see below through the trees. After all, I wouldn't want to miss seeing my MIB heading for the driveway!

* I've shown my closet on a previous post, but the top shelf really needed to be "weeded" of unnecessary stuff! (Yes, there is such a thing as "unnecessary" in stamping!)

Hope you enjoyed the tour! (Click on photos for a closer view.)

THE MORNING AFTER


Additional photos are posted on our Fox Mountain blog (link at right.)

SCRAP DRAWER #6


Just thought I'd try a quilted pattern for a change, but it was very time consuming. Although I enjoyed learning something new, I won't be doing this one again.

The bee theme really worked, with three matching buttons I found in my stash from years ago! I'm not a hoarder, but sometimes it really pays to hang on to things awhile (as long as it doesn't take up a lot of space.) The black cardstock is mounted with dimensionals, and the bee's wings have a touch of Stickles on them.

Monday, February 8, 2010

DE-CLUTTER DE HOUSE (Kitchen)

This challenge is a big one! You know what's lurking behind those cabinet doors and drawers, so go for it. Which one bugs you the most: under the sink? the freezer? the "junk" drawer? the pantry? all of the above?

Remember, this is not about cleaning; it's about sorting, rearranging and purging so that cleaning is easier without having to work around unwanted/unnecessary items in the way. Streamline the kitchen and you'll feel a lot less stress.

Mismatched glassware? How about discarding them all and treating yourself to a new matching set from Walmart or the dollar store. Too many plastic containers? Use them for storing things in other parts of the house, maybe even your stamping area. Mishmash of cleaning supplies? Try reducing them to a few all-purpose products instead. Outdated foods and other supplies? That's what those large brown plastic bags are for!

Have fun! Make "Purge" your new favorite word!

Saturday, February 6, 2010

Friday, February 5, 2010

BLACKBIRDS VIDEO

Check out the video I posted on my Fox Mountain blog! (Link at right.)

Thursday, February 4, 2010

LAST OF THE VALENTINES


These are just 3 of the many Valentines I stamped up the other day when the temperature reached only 16 degrees for a high.

The bottom one with the oval I CASEd from a similar card I saw on the Hero Arts blog. The large butterfly has wire antennae, the others I drew in with a black marker.

The red one looks better IRL. The gold Twinkling H2O's on the wings and body have a delicate shimmer, which doesn't show up as well here. The ferns were stamped with Versamark and clear embossed.

Last, the one with the dark brown butterflies has a HUGE error in it which doesn't show up here: the French Script was stamped upside down! That's why there's so much busy-ness on the front. I figured I'd cover up as much of the writing as possible. Thankfully, the script is so faint that most people wouldn't notice. Did you?

Tuesday, February 2, 2010

DE-CLUTTER DE HOUSE (Bathrooms)

This one doesn't sound like much--until you open up the cabinet, the makeup drawer, the medicine cabinet... It's time to toss all those outdated meds and cold remedies, unused items that have been pushed to the back of a drawer, old makeup, and anything gooey.(lol)

Once you clean out the drawers and cabinets, you'll have more room to store what you really need and less clutter on the counter or sink top. Less clutter means quicker cleaning which translates to more time to stamp!

When it comes to bathroom cleaning, I don't have a specific time to clean mine. I just clean something every time I'm in there. For instance, while I'm in the shower, I spray some Soft Scrub on the walls and glass doors and clean them as needed. After brushing my teeth, I rinse the sink with water and dry with a paper towel. Then I use the wet paper towel to shine the faucet, clean the mirror, countertop and lastly, the toilet rim. The only thing left is the floor, which I do at another time.

Leaving the bathrooms clean whenever I use any of them (we have 2 1/2) only takes an extra minute or two each time. If I could only get my DH to do the same...

Monday, February 1, 2010

Easter Daffodils


Happy Ground Hog"s Day!

(This one was tough to photograph for some reason, but I'm finally happy with it.)

After stamping the image several times, I watercolored them and cut them out. Four additional blossoms were stamped and cut separately and popped out with SU dimensionals. Not shown here is the addition of yellow Stickles (added later) around the center edges of each daffodil.

I love this new set for Easter from SU's Occasions Mini and plan to make most of my Easter cards with it, except that I won't be doing this much cutting. Using a Nesties oval will serve to highlight the future smaller image.

Spring flowers bring the opportunity for more colorful cards, especially after all the white-on-white snowflake cards we made for Christmas!