Wednesday, August 31, 2016

THREE OF A KIND--SPLITS

Can you tell I'm lovin' these Splits from PaperTrey Ink??

These three each use a different set and are cut to three different sizes.  It was fun making these!

My favorite is the sympathy card, but it's sad that I needed it this week.

Tuesday, August 30, 2016

SPLITS--Thanksgiving Card

This set is going to make some nice Thanksgiving cards.  Before popping it up on the card, I stamped some oak leaves with my peg stamp.  Then I colored in the stamped leaves around the greeting and mounted it on the card front.

I added the jute and sequins for some embellishment and rounded the bottom right corner.

I think I like this SPLIT set the most!

SPLITS from Paper Trey Ink

I was so impressed with these Mini Sets of "Splits" that I ordered three different ones.  This is the first try, and already I can see that they're going to be used a lot.

This one is called "Just a Note," but there are lots of other stamps that will fit in the space provided.  The matching dies make them easy to pop up for dimension.  This one is mounted offset so that the dsp underneath would show.  I had sequins that matched the colors in the dsp, so I added them for embellishment.

Monday, August 29, 2016

BOTANICAL BIRTHDAY

Once again, the Botanical Builder dies come in handy for a summery birthday card.  The frame is from W Plus 9 which I used on a piece from the English Garden dsp pack. 

The greeting and scalloped punch are from SU!.

It seems the Botanical set has endless uses...

Sunday, August 28, 2016

SOFTER PASTOR CARD

Although not as masculine as others I've made for our pastor, I really like the soft look of this card.  I do think the embossed panel gives it enough texture to keep it from being too feminine.

The butterfly is die cut from a ;iece of dsp which matches the gray and yellow used on the card base and panel.  The Bible verse was done in an airy font, which complements the butterfly.

Friday, August 26, 2016

ANOTHER FUSE TOOL CARD

This shaker card, filled with bird seed, made an interactive birthday card for a blogger friend's granddaughter.

In addition to the shaker, I also put the bird on an action wobble for added interest!

Thursday, August 25, 2016

BIRDSEED CARD

This little bird is just perfect for this card on which I added some birdseed at the bottom.  Very appropriate, don't you think?

After using some brown ink on the beak, feet and tail of the bird, I popped him up on the card. This will make a nice pastor card.

The message is from the SU! "Trust God" set, which I enjoy using a lot.

Wednesday, August 24, 2016

FUSE TOOL

Evelyn and I got to play with her new fuse tool (which I gave her for her birthday,) and it was a lot of fun!

We each made this same card, filling a pouch with assorted sequins, beads and flowers.  The Fuse Tool sure made it a lot easier to make a shaker card.  Although it doesn't shake as freely as it would with two layers of foam, it also keeps the contents from falling to the bottom.  I guess that's what you call a trade off.

Tuesday, August 23, 2016

LITTLE TREE, BIG WISH

Since I'm teaching "De-clutter de House" at Bible Study this Fall, (along with Scripture references each week)  I figured I need to practice what I'll be teaching!  After spending Sat. afternoon purging my stamping room closet, I packed up 4 shopping bags/baskets full of giveaway stuff and called Joan to take it to her DIL.  She is a new stamper who will appreciate some free stamping items.

This embossing folder oval has a tree at the bottom which can either be used for Christmas or covered over for a different card anytime during the year.  It's been in my stash for a long time, so I'm ready to let it go, however.  I think I'll give it to one of my "J" friends!

Tuesday, August 16, 2016

IN MY THOUGHTS

I finally came up with a way to use this flower that has been sitting on my table for ages.  It was die cut from one of the dies in the botanical framelits set.  The plaid background paper was rediscovered from my scrap drawer, and the green label was cut from another leftover piece.

If you look closely, you can see that one of the flower layers was actually die cut from the same plaid dsp.  It sure is worth it to hang on to large scraps!

Monday, August 15, 2016

HYDRANGEA Z-FOLD

The gold foil paper really makes this card stand out.  I resisted the temptation to add a lot of embellishments, except for the gold twine bow and the purple button.

It's  been so hot here lately, that spending time stamping in the tower has been even more of a pleasure.  This set is really fun to play with!

Sunday, August 14, 2016

Z-FOLD WORDS OF ENCOURAGEMENT

This card is on its way to a friend whose husband is dealing with some health issues.  Since it is a Z-fold, there is not a lot of room to write.

However, it doesn't take a lot of words to cheer or encourage someone.  Just sending a card you make yourself says even more than the words in the card.  Having been on the receiving end of cards from friends who let me know they were thinking of me during a difficult time was such a blessing.

Pass it on!

WOODGRAIN EXPERIMENT


I've been admiring the wood backgrounds that look like boards or barn siding, so I came up with my own.

Using the woodgrain  background stamp I already have, I stamped it on white with Pumice Stone Distress Ink.  I cut the panel to 4 x 5 1/4" and used my ScorPal to make "boards" 1" wide.  After making the grooves, I used a ruler and gray marker to color them.  Then I drew lines across at varying intervals.

This will make a nice masculine card for our pastor to use.

Saturday, August 13, 2016

GUESS WHAT ARRIVED IN THE MAIL TODAY!

THOUGHTFUL BRANCHES!  I just ordered it on Monday, so I was surprised to have it so soon.

This is the first (of many cards!) that I'll  make with this set.  After posting this, I removed the leaf because I thought it looked a little too big.  I'll make another and glue it on the inside.

Stay tuned for more creations with this beautiful set.


Sunday, August 7, 2016

RECYCLED CHRISTMAS CARD

I came across this oval die cut in my stash the other day and decided to put together another card.  All I did was attach the oval with double stick tape, mount the silver tree with dimensionals, stamp the greeting and tie the silver  cording on the side.  As Frenchie would say, "Voila!"

This card is now in the box with all the Christmas cards I've made so far.

I will add this post to the Christmas Challenge blog HERE

Friday, August 5, 2016

EASIEST CARD EVER


All it took was a piece of designer paper, the SU small butterfly punch and a die...oh, and about 10 minutes.

Thursday, August 4, 2016

CHRISTMAS CARD CHALLENGE


Since I send out over 100 Christmas cards, they have to be simple to mass produce.  This one is done with an Our Daily Bread Designs die.  To make sure all the little bits of paper can be removed easily, I use dryer sheets in the cutting process.

After die cutting the verse, I glued it to the card front (over  some dsp) and added 3 tiny rhinestones for some extra shine.

This is my first entry at the Christmas Card Challenges blog, and I enjoy seeing what others are doing.

PAPER PLAYERS #306


This week's challenge was a Tic-Tac-Toe choice.  I opted  for the diagonal "Enamel Dots, Patterned Paper, Die Cut."  Since I don't have a small butterfly die, I used my SU punch instead.

The butterfly was punched from an empty  cardboard tissue box.  They have such nice designs now that I hate to just throw them away!


CAS stamping + Spraying + Choice


It took me awhile to find the sprays in my stamping tower, but this card went fast after that!

I've been using dies for so long, it was a pleasure to actually stamp an image.  The fern is from a Papertrey Ink set, and the greeting is from MFT Spring Tulips.  My "choice" was in adding punched butterflies.

After spritzing the background paper with Mr. Huey's Opaque White, I set it aside to dry while I gathered my stamps and punched the b'flies.  Next, I stamped the fern with Versafine Olympia Green twice without re-inking, then the greeting with Versafine black.  After adding the b'flies and "dressing" them with pearls, I mounted the finished panel on a white card base.


WHERE DID JULY GO?


Is it just me, or is this summer going fast??

Now that July is over (and we're that much closer to winter) I've remade the July calendar page into a new card.  It will make a nice encouragement card for someone.

Saturday, July 30, 2016

SOMETHING TO PONDER

We'll be on our way home tomorrow after a week of fun in the sun.  Right now it's pouring and thundering with lightning flashing all around us.  Thankfully, we already packed the car except for one bag we need in the morning; so we didn't have to deal with the heavy rain.  It was a great week!

Here's a question to ponder:  If snowflakes are winter's butterflies, does that mean butterflies are summer's snowflakes?  Hmmm...

Tuesday, July 26, 2016

JUST A TIP FROM OBX TODAY!

Having a wonderful, relaxing vacation this week at "our" beach house.  No card for today, but here are two tips for making spinner cards:

1.  I use dental floss or fishing line for the spinner so that it doesn't stretch.

2.  To reset the spinner, instead of twirling it with my fingers, I just blow on one side of the spinner and close the card.

Hope you're staying cool today wherever you are!  Remember, when it gets really hot, it beats chipping ice off the windshield!

Monday, July 18, 2016

COOL CARD FOR A HOT FRIEND

When my Silver Stamper friend from Oklahoma wrote and told me that the temps were over 100 this week, I just had to send her a card to make her feel cool.

Combining two seasons into one, I embellished the quilted snowflake with a foil butterfly from my scrap drawer.

...and I thought today's temp of 93 here in NJ was hot!

Sunday, July 17, 2016

PAPER PLAYERS--Water Color


Here's another card from another page of the Painterly Days book featured in the post below--and just in time for the latest Paper Players challenge!

This one is called "Peonies and Butterflies."  After this post, I will be adding some shimmer water color paint to the blossom.

The pages in this book have made water coloring so much easier and fun for me!

Saturday, July 16, 2016

SUCCESS AT LAST!


My attempts at water coloring have been frustrating, to say the least.  That is UNTIL I discovered a delightful adult coloring book featured on Kristina Werner's blog.  The title is, ":Painterly Days, Flowers" by Kristi Rice and is available on Amazon.

After reading her tips and admiring the flowers and foliage on each page, I got out my water brush and three types of paints:  watercolor crayons, Peerless paints, and a set of pearlized paints.  I colored three flowers and the foliage on the first page of anemones just to see how they each differed.  I started with the crayon paints, which is what you see on this card and also turned out to be the best, in my opinion.

Starting at the top, I painted the flower and leaves with the pearlized paints.  Although my least favorite, these paints work nicely over other paints to give them a sheer pearly finish.  They also did not blend well.

Next, in the left bottom corner, is the Peerless sample.  This also did not blend well, which was surprising.  It could be the paper, a cheap brush or just my lack of experience.

However, the WC crayons (Lyra) blended nicely and was the most realistic of all three flowers.

As for the card itself, I had a lot of fun putting it together.  Using the WC crayons, I first painted the blossom, berries and leaves, cutting it down to a strip for the front of the card.  I mounted it on a piece of green cs, using the same cs for the "hello" die cut.   I found the butterfly in my stash, and it went perfectly with the orange flower center.  I gave it some shine with my Wink of Stella.  Before assembling the completed strip, I ran the card through the Big Shot with a floral ef to give it some texture.

Not wanting to waste anything left over, I made a second card with the scraps.  The bird was die cut from a scrap of marbled metallic paper and backed with the same gray paper as the greeting.

I can see that I'll be using this beautiful water coloring book a lot!

Tuesday, July 5, 2016

POST SURGERY GET WELL

This is the card I made for my friend, Jackie, who recently had hernia surgery.  Inside, I made a checklist of things she should or should not do until she heals.  Of course, stamping was on the OK list!

At the end of the list, I wrote ""Enjoy your VACovery!"

One of the things I love about making and sending handmade cards is that you can make them say whatever is appropriate to the person.  I've often said that sending cards with personal messages inside is truly a ministry and means a lot to those who receive them.  It's a wonderful way to brighten someone's day!


Monday, July 4, 2016

HAPPY BIRTHDAY AMERICA!

What a great privilege it is to live in this great country of ours!  I thank God every day for my family and friends, my home, the beauty that surrounds us and the freedom we all enjoy every day.  In spite of enemies who would tear us down, this is still the only place I'd want to be.  I'm especially grateful to have my children and grandchildren nearby.

Happy Fourth of July to all my blogging friends!

Sunday, July 3, 2016

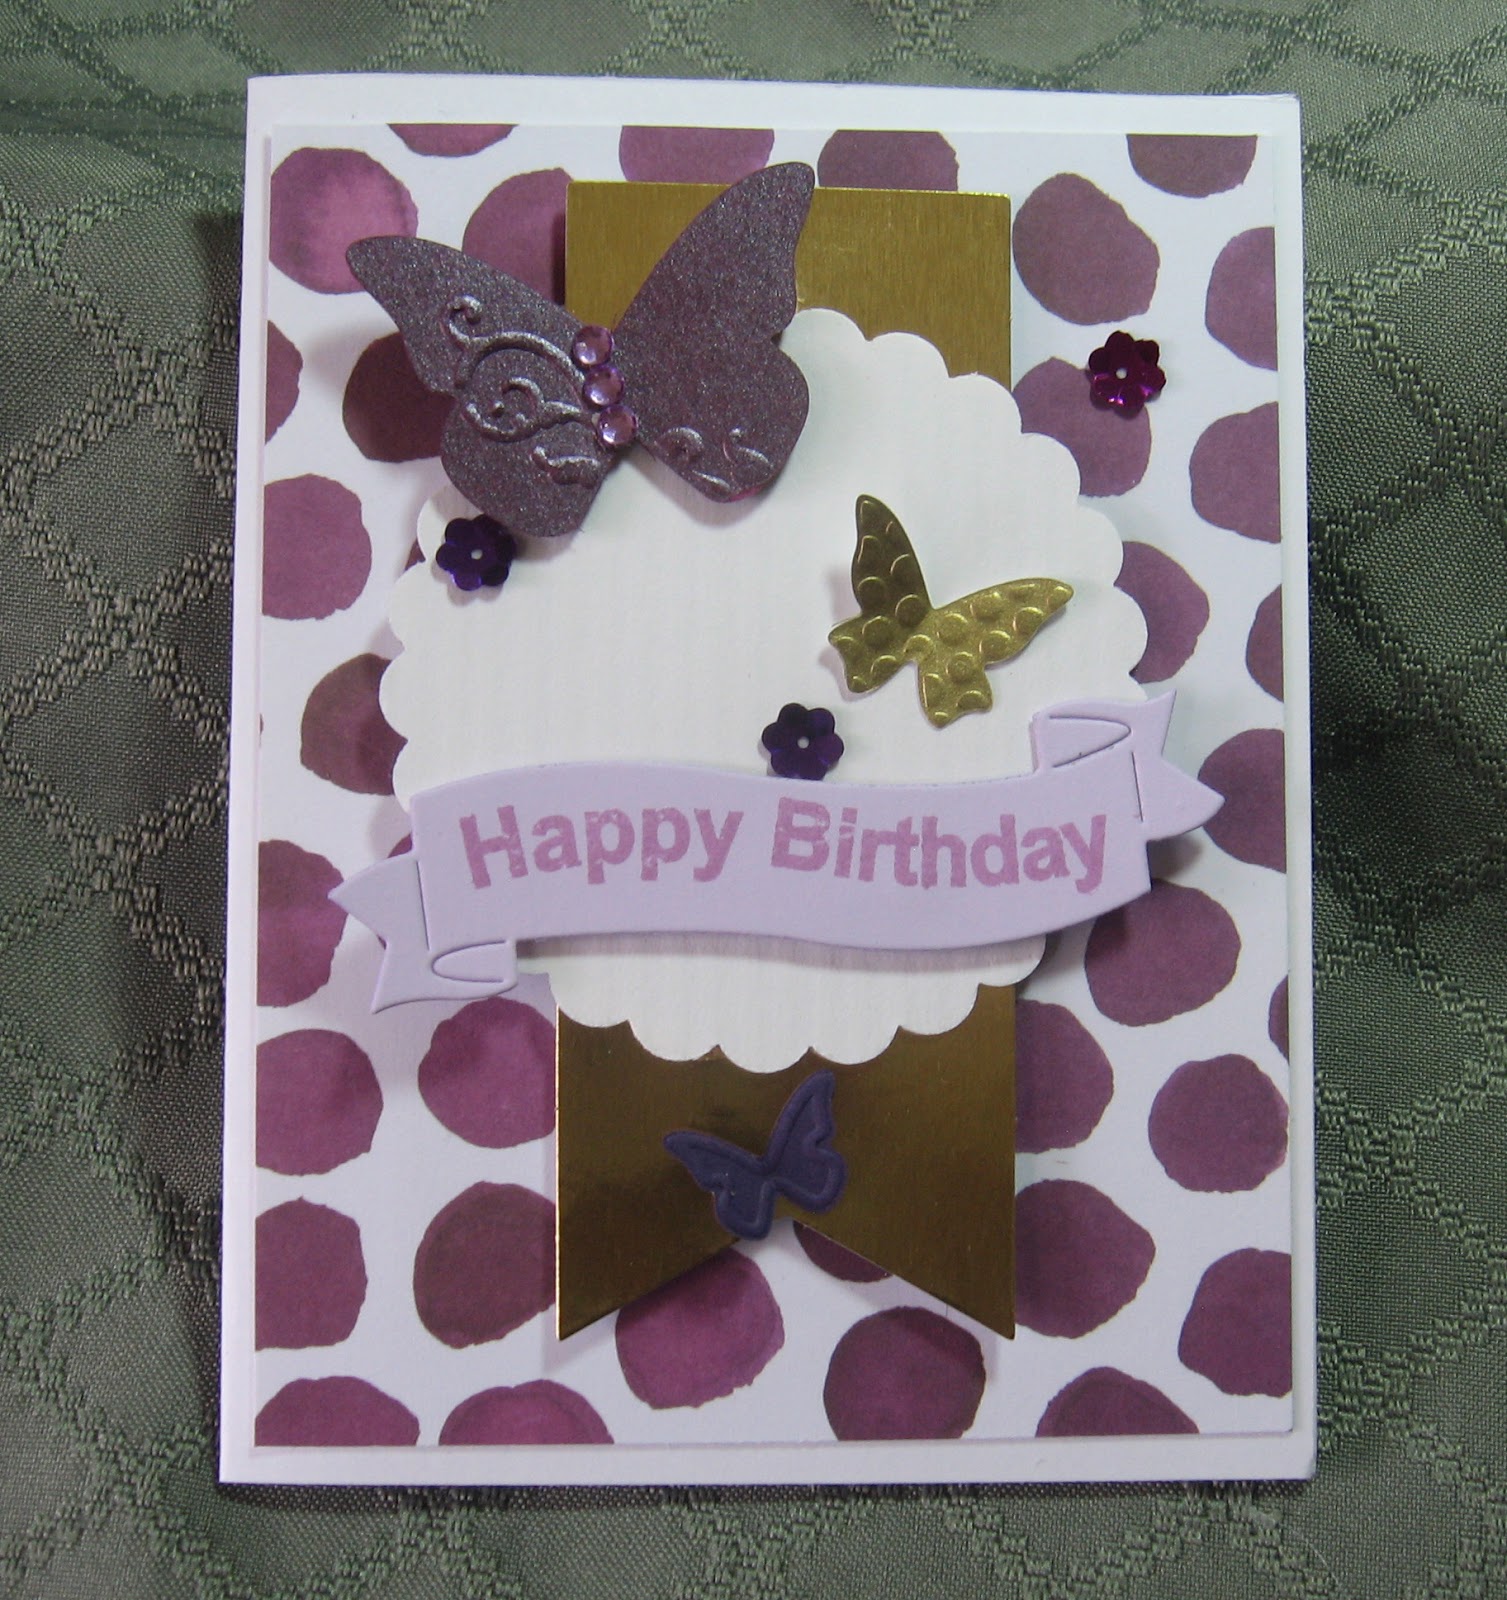
GOODBYE JUNE, HELLO JULY BIRTHDAY

 This card was originally the June page from the Paper Pumpkin perpetual calendar.  As I've done at the end of each month, I  carefully peeled the month off and cut down the dsp to fit a card front.

After attaching the dsp, along with the gold foil banner, I added the scalloped circle, butterflies and birthday banner.  A few matching sequins and some gems for the large butterfly, and the card was done.

I'm so glad these calendar pages can be redone to serve another purpose.

Tuesday, June 28, 2016

VERTICAL BIRTHDAY

This folio card was in my stash already scored, so I used it for a topiary birthday card.  The left side is taped down, and the dsp overs the fold.

After stamping the potted tree in a soft green, I used plain ol' ordinary markers to color over it.  I tapped on the green, colored the trunk and pot, then added the shadow.  After mounting the image to a green rectangle, I popped it on the card front with dimensionals.

For the greeting, I made a little banner from scrap and attached it at the top.  For embellishment, I added several tiny clear gems on the tree.


Sunday, June 26, 2016

PAPER PLAYERS 301

This card was sitting on my desk from last week, and it fits perfectly for this week's Paper Players challenge--who knew??

The stamp is from an old set I have in my stash from my days as a demonstrator for The Angel Company.  Sadly, the company is gone, so I treasure my TAC stamp sets.  This one is so me...


Saturday, June 25, 2016

FEMININE CARD

This was one of those cards that just "evolve" as I go along, and I love how it turned out.

First, I die cut some flowers from a leftover piece of watercolor paper that I used to experiment with Color Burst powders (purple).  For contrast, I also die cut some of the smaller flowers from some dsp.

After choosing the dsp for the card front and a coordinating piece of pre-printed vellum, I mounted them as shown.  Next I assembled the flowers and mounted them along the edge of the vellum.  The greeting, stamped on plain white cs cut down to form a banner along the side, is from the SU! set, "Vertical Greetings."  For embellishment, I used yellow gems for the flowers and a purple gem for the top of the banner.

Wednesday, June 22, 2016

LIVE, LOVE, GROW


The challenge with this card was to use acetate so that the terrarium looks like it's under a glass dome.  Cutting acetate to fit over the cover was next to impossible, especially since the adhesive would show.

The look was finally achieved by cutting the window square from a square frame die I got from My Favorite Things.  After die cutting the  window, I attached a square piece of acetate to the back with Score tape.  After gluing the terrarium to the card front,  I adhered the frame to the card over the terrarium.  Then I cut the card down to a square and added the bow to fnish it off.

I also used this stamp set for a birthday card.  Instead of the plants, I placed a birthday cake slice inside!


Tuesday, June 21, 2016

YOU CAN'T BUY HAPPINESS!

I'm always on the lookout for humorous birthday greetings, and Mama Elephant came through with this one!  The name of the set is Carnival Toppers.

After gluing the dsp to the card front, I simply added the saying and a cupcake from another set  (can't remember which one or where it is.)  Then I added the little flower and gem.  Finally, I used lilac embroidery floss on the left.

Very simple card to make.


Monday, June 20, 2016

GOODBYE MAY!

This started out as the calendar for May that I turned into a card.

After removing the calendar, I stamped "Birthday" on a scrap of white cs,  glued it over the word "May" and re-mounted the wreath  over the spot where the calendar was.  I sponged some sky and added a die cut "happy" above the wreath.  Then I mounted the panel on the front of a white card base.

I love that this perpetual calendar from the December Paper Pumpkin has done double duty as each month ends!

Saturday, June 18, 2016

MUSEUM "REPORT"

Our inspirational trip to the NY Met. Museum of Art was a lot of fun.  Evelyn, Carolyn and I left my house around 9 am (after rush hour traffic was over) and arrived at the museum around 10:45.  After entering the museum, we first took a guided tour.  Since this was Carolyn's first visit (gasp!) I thought this would be a good way to get oriented.  I reminded her that the museum has artwork everywhere you look, but you have to ignore the displays you're walking through and focus on where you want to go...very hard to do!

The tour was of art in the Byzantine era and lasted one hour.  Our guide was very knowledgeable of the history as well as the art pieces she took us to.  She started with a map of the Mediterranean Ring (North Africa, Spain, Italy, Greece and the Middle East as it was in the time of Constantine.)  The arts included sculpture, architecture, silver and gold artifacts, and even a  stained glass window.  I suspect she had a Phd. but spoke on our level, answering questions from our small group as we went along.  The only downside of the hour was that the marble floors were very hard on my back but it was well worth it.

After lunch in the cafeteria (really a self-serve restaurant the food is so good) we went back upstairs and headed for the Arms and Armor hall.  Carolyn was amazed at the deailed artwork on all the pieces on display, especially those for the horses.  After all, if your horse goes down in battle,  you're going down with it!

Next was a special exhibit on fashion which was unexpectedly amazing.  The centerpiece was a wedding gown of the house of Chanel.  There were gold sequins and gems on a long train that sparkled under the bright lights and reflected in a kaleidescope  on the domed ceiling.  The other exhibits were from several other designers, the most fascinating of which was a cocktail dress made of straws.  They were all stunning!

Next, I took Carolyn and Evelyn to see one of my favorite paintings, a huge masterpiece of Joan of Arc as a young peasant girl..  From there, we went to see their collection of impressionist paintings.  After a stop to browse the gift shop, we headed for home, a bit tired from all the walking but happy to have done it.

Praise God for getting us home safely in heavy traffic going 70 mph or more!


HOSTESS THANK-YOU NOTES

It seems I've been making a lot of card sets lately!  This one was for my friend, Gail, who had a garden tea last week.  Several people brought hostess gifts, so I made a batch of these for her to use.

I wanted to make something reflective of the rose garden setting, and the Painted Petals set from SU! was ideal.  The leaves are from a Penny Black set, Petal Power.  The tiny flowers and dots were from my peg stamp drawer.

After stamping the leaves onto a die cut stitched rectangle, I started adding the flowers.  Beginning with the largest, I stamped the roses in Watermelon Wonder to match the card base.  Then I added the yellow clusters, the purple blooms and the blue dots.

The sentiment was stamped on a piece of white scrap, sponged with Watermelon Wonder ink and mounted with a dimensional.  Inside, there is a white panel with a flower stamped in the left bottom corner.  To finish it off, I also decorated the envelopes.

These were fun to make and I had all six done in record time!


GRADUATION THANK-YOU NOTES


When asked to make 16 thank-you notes for our grandson to use, I had to come up with something simple.  This wasn't as easy as it looks, but I've got a dozen made.  The last four will be a little different, I think.  What made this so time consuming was pasting the little pieces in the a, y and o of the letters that were die cut.

One thing that helped was Press and Seal wrap from my kitchen drawer.  Before running the blue panels through the Big Shot, I lined up all the letters on top of the wrap, added the "you" die and pressed the letters onto each blue  panel to cut the word and letters all at once.  The letters stayed in place for all 14 cards.  (A BIG thank you to Jennifer McGuire's husband who invented Press and Seal!)

The card is done in school colors, of course, with the panel mounted on the gold card base so that he would be able to easily write on the inside.


Thursday, June 16, 2016

OFF TO THE CITY TODAY!

One day last week my friend Carolyn mentioned that she'd never been to the Metropolitan Museum of Art in NYC, which is only an hour away.  Since that is my favorite museum, we decided to make the trip and chose this date.  So today, that's where I will be with Carolyn and Evelyn.  It's a rainy day today, which will not affect us at all since the museum has a parking garage attached and a cafeteria with great foods.  We'll start by going on a guided tour of museum highlights, then have lunch and then explore a few exhibits before leaving around 3:00 ahead of rush hour traffic.

Check back tomorrow for an update!

BTW, it's been awhile since my last post because I've been busy making 50 cards for our pastor to use as follow-ups after VBS.  I also made 5 thank-you notes with matching envelopes for my friend, Gail, who had a garden tea last weekend.  I'm now finishing up on a set of thank-yous for our grandson to use for his graduation gifts.  Once I'm done, I plan to post them--hopefully, tomorrow.


Friday, June 10, 2016

HOW DID THAT HAPPEN???


Suddenly, I find myself being the grandmother of a high school graduate!

To celebrate, I made this card with his school colors.  Using a new set of number dies, star dies and "Happy Graduation" stamps all from My Favorite Things, I came up with this folio card.

Shown here are the front and inside of the card.


If you need a card for graduation, this stamp set has lots of great sayings, so check it out!

Monday, June 6, 2016

IN FRIENDSHIP

This card started out with a store-bought card base from AC Moore.  The muted colors make a nice soft background for the bold Botanical Builder dies, especially the deep scarlet flower.

The banner is from a set of two that I got at Frantic Stamper, which also includes a number of pre-curved stamps.  The die for this one comes out flat as shown, while the other one has embossed lines to fold the tails under for a popped up banner.

As you can see, I'm still have fun with this set of dies!


Friday, June 3, 2016

JUST BECAUSE

This card went out already, and I love how it turned out.  Again, the Botanical Blooms are on display!

The bottoms two thirds of the card front is covered with a piece of vellum for its softening effect.  The flower petals are sponged to give them some dimension, and the twine is added for texture.

The greeting is from the SU! set, Tin of Cards.

Thursday, June 2, 2016

ANOTHER BOTANICAL BLOOM


 There just seems to be no end of ways to use the Botanical Builder die set from SU!  The greeting is from the Tin of Cards stamp set, which comes in handy often.  The butterfly was punched out of a scrap of silver glitter paper and embellished with pearls for the body.

I find I'm using more dies than stamps lately?  Are you?


Friday, May 27, 2016

ANNIVERSARY CARD


Today is our 49th anniversary, and this is the card I made for my husband.

The rose was clear embossed on white cs and watercolored using Twinkling H2O's.  After mounting the rose panel to the cardfront, I embellished with clear Wiink of Stella and a few sequins.

Next, I added the pale aqua dsp and the narrow cardstock strip between the two panels.  Finally, I added the greeting.

Can't believe it's been 49 years--and they said it would never last!

Monday, May 23, 2016

MEMORIAL DAY TRIBUTE

My friend, Evelyn, gave me this Poppy die set along with a lovely note of tribute to my Dad. 

Although I appreciate her gift of the dies, I was very moved by her words in honoring my Dad whom she had gone to visit with me awhile back..  He was a WWII veteran who very rarely spoke of his experiences in the war.  For some reason, he felt comfortable with Evelyn that day and told us some things I'd never heard him speak of before.  It made such an impression on both of us, that we spoke about it during the 2-hour ride home (and many times since.)

This Memorial Day take a moment to reflect on the service of those who have put their lives on the line for our country.  If you know someone presently in the military, send him (or her) a word of gratitude.  They will be so glad you did!


NOTE:  I posted this early so you would have time to send a card to someone who's far from home.

Sunday, May 22, 2016

SHAKER CARD FOR SHUT IN

One of the ladies from our Bible Study fell and broke her foot.  Actually, shattered would be closer to the truth.  She will be in rehab for several weeks, so I made this card to let her know she's not forgotten.

For the shaker portion, I used a piece of dsp from the Tribal Chic dsp set at Lil' Inkers.  The stitched square die also came from the same company.  The two pieces of cardstock are from scraps (again!) in my stash, and I like the way they work together.  I also had the same colors in my sequin collection.

Once the shaker was made, I attached it as shown and proceeded to add the flower.  I used two of the dies from the Botanical Blooms set and some -- you guessed it--scraps again.  I sponged the petals with Fired Brick Distress ink and added them to the corner of the shaker.  Using a Martha Stewart fern punch, I added a few of them underneath with glue dots.  The greeting was punched with the window word punch and reinserted on the right side to make it smaller.

I hope this card brightens the day of a lady whose fall has shaken up her regular routine.

Friday, May 20, 2016

THREE OF A KIND--Christmas

Just got a new die for Christmas, and I LOVE it!

These cards were easier to make than they look.  First I made the top one with peg stamps using Versamark and gold ep on the card base in the shape of the tree..  Then I die  cut the dsp and white cs using the tree die.  I used the "frame" for the top card, and the tree for the card on the right.  After gluing down the frame, I attached the white tree with a glue dot at the top and bottom.

Next, I cut a piece of gold metallic cs to 4 x 5 1/4" and die cut the stitched rectangle from the middle.  I added the gold cs over a wood-grain embossed card front with dimensionals.  Then I added the dsp tree and the smaller white tree center as shown.  The woodgrain embossing adds a lot of texture.

For the card on the left, I attached the gold metallic gold frame to the front with narrow strips of foam mounting tape to keep it from "caving" and glued the dsp in the middle.  Then I carefully glued the white panel onto the gold frame and attached the white tree with glue dots at the top and bottom.

FOR A HERO ARTS VIDEO on how this was done, click HERE!


PRESCHOOL TEACHERS THANK-YOU'S

The teachers at our Church's preschool are in need of thank-you notes as the school year comes to an end.  When they asked me to make some, I wasn't sure what I could come up with since I have very few child-related stamps.

This card is the solution I came up with, keeping it simple and to the point.  By using my alphabet dies and pasting them on primary color squares, I stacked the squares like blocks.  The sentiment is from an old SU! set, "Outlined For Fun."  After stamping "thanks" on the lower right and coloring it with markers in the same colors as the blocks, it was done.

Once again, CAS saves the day!

Wednesday, May 18, 2016

FOR A DYING FRIEND

What do you write to someone who has been battling Pancreatic cancer for two years and is now facing the reality of her final weeks?  As a believer, I could only think of words encouraging her to look to the hope she has in our Savior.

As the hymn goes, "Because He lives, I can face tomorrow...," whatever tomorrow may hold.  He is the One Who numbers our days and prepares a place for us in His presence to enjoy Him forever.  Death has indeed lost its victory and its sting for all those who look to Jesus Christ as their Savior.


Sunday, May 8, 2016

HAPPY MOTHERS DAY!

The sun is finally shining here in NW NJ after many days of cold and rainy weather.  While truly grateful for the much-needed rain, the sunshine is a welcome relief.

Mothers Day was celebrated last night at my daughter's house with my son and DIL, all 4 grandchildren and a lovely dinner.  Both families now live just 20 minutes away which is a great joy.

I hope you are all having a wonderful day!


Friday, May 6, 2016

PAPER PUMPKIN ALTERNATE FOR APRIL 2016

After completing the wreath project that arrived in the April kit, I used one of the leftover labels for this card.

The card front is from the calendar kit in the December Paper Pumpkin, so I guess that makes it a double alternate.  After removing the calendar and salvaging what could be reused, I put them together as shown.

The wreath from this month's Paper Pumpkin is now hanging on the door to my Tower and is a perfect color match, too!

Wednesday, May 4, 2016

THREE OF A KIND--Split Card Front

It's butterfly season again (soon!)  Have you seen any yet in your yard?
At least we can enjoy them on cards.

These three started with the one on the top left.  I started with dry embossing on the front, then cut the diagonal.  The trick here is to trim the 1/2" off the  bottom instead of the angle (much easier.)

Next, I stamped the message, cut it into two pieces and mounted them with tape as shown.  The dsp panel was then mounted on the back of the top flap and the smaller piece was mounted on the bottom of the dsp, leaving the 1/2" gap.  Finally, the butterfly was die cut from the same dsp and attached with glue dots.

On the second card, I started out with sponging on a triangle stencil using blue and green dye inks.  The greeting was stamped on a scrap of the dsp underlay with the butterfly attached last.

Finally, the third card was done by mounting the dsp on top of the cardfront, using a scrap of cardstock in a matching color for the butterfly.  The greeting was stamped on a scrap of dsp with a small metallic butterfly.

The dsp for all three cards were from the Lil Inkers pack of Tribal Chic patterns.

Sunday, May 1, 2016

FOR A BLOGGER FRIEND

I have a stamp that says "I love my computer.cause all my friends live in there."  How true!  I'm glad I also have many other friends on this side of the screen, however. 

This card will be going to one of my computer friends who has some health issues and hasn't left a comment or corresponded lately.  The stamps, two of them, are from a new set that recently arrived in the mail (how did that happen???)  It will be going out tomorrow (Monday) with a note of encouragement.

The flower is from the SU Botanical Blooms die set.  The dsp is from Lil Inker and coordinates with their triangle dies and this stamp set.

Spring is finally here.  The leaves are popping on all the trees and bushes, and the Spring flowers are bursting forth in their pastel colors.  The flower beds have all been mulched and hostas are poking through.  When anyone asks how I have such a beautiful yard, I just tell them it's because I sleep with the gardener LOL...