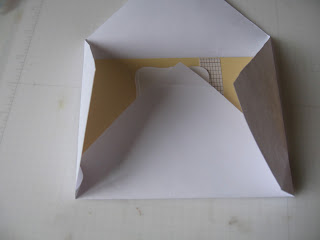
2. Open the sides and fold the bottom flap up so that the point lines up visually with the point of the flap above. It should come almost to the edge of an A2 card, as shown.
3. Refold the bottom and sides so that the side flaps are under the bottom flap. Fold over the point so make it neater. (The ruler is just there to hold it closed for the photo.)
4. Fold the top flap down. Then open all the flaps and remove the card.
5. Cut out all 4 of the small triangles and refold, using glue stick or snail on the sides of the bottom flap. Now it is ready for mailing. Just add glue or snail to the sides of the top flap to seal. (Refer to previous photo.)
I hope this helps!


1 comment:
Just be careful about making your own envelopes. The Post Office has specific sizes of envelopes that are acceptable, otherwise you have to pay extra postage.
Post a Comment