...IS TO HAVE YOUR CARD COME APART AFTER YOU SEND IT!
You might recognize this shadow box card from my April 19th post which had the Forest Friends image inside. When I picked it up off my table the other day, the inside fell out! It seems the cheaper snail adhesive I was using does not hold very well. Now I'm wondering how many of the cards I sent out with that tape also fell apart. I still plan to use it up, but only on light weight paper and spots where the main points (such as corners) are held down with Scotch double stick tape. Just thought you might like to know... Meanwhile, I like this inside better and will use the other image on a standard card later.
A site to post my latest hand-stamped greeting cards. BE SURE TO CLICK ON PHOTOS TO ENLARGE!
Wednesday, May 29, 2013
Tuesday, May 28, 2013
ANNIVERSARY CARD
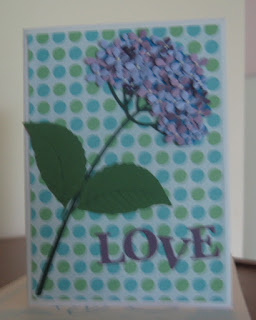
Sorry this is out of focus, but you get the idea (I hope!) This is the card I made for my husband on our 46th anniversary yesterday. I picked up this die set at the stamp show last month, and I love how it came out IRL.
First I used the die on dark green cs for the stem and the leaf die on a lighter green. Next I cut the piece that is actually the base hidden beneath the individual blossoms. The die for the blossoms cuts 4 large and 4 small blossoms at a time, both of which were used here. I used three shades of purple and a mixture of both sizes.
To glue the blossoms onto the base, I used Tom Bow Mono glue. Using tweezers, I dipped the bottom center of each blossom into a little dollop of glue on a piece of plastic, bent the petals forward, and put each in place. Once I was happy with the coverage of blossoms on the base, I added white Liquid Pearls in the center of those on top and let everything dry.
Although this sounds tedious, it was really quite simple to do.
For the LOVE letters (no pun intended) I used alphabet dies.
Notice there's no stamping involved here. (The Hydrangea die set is from Impression Obsession HERE.)
Friday, May 24, 2013
SAME CARD 3 WAYS
What a difference one narrow piece of dsp can make on a card! Here is the same card shown with three changes of dsp across the bottom, giving each card a different look. Which do you like best?
For the Mothers Class where we made this card, the lesson for this final week was the "kissing" technique. For the large flower, we inked up the stamp in purple chalk ink and "kissed off" on a clean Filigree background stamp. This removes some of the purple ink from the flower stamp, leaving the filigree design in its place. The leaves were inked in green chalk ink and kissed off on a plaid background stamp the same way.
For the little yellow flowers, we "stamped on" using yellow chalk ink on the flower stamp and red ink on the plaid stamp. By "kissing" them together, the plaid design was added to the stamp.
Click on one of the photos for a closer look at the flowers and leaves.
As a final lesson for this year's classes, I showed them how to make envelopes using an 8 1/2" square of plain white typing paper.
(There are lots of videos for these techniques on YouTube. Just be sure to use the word "stamp" when searching for the kissing technique; otherwise, I don't know what might come up!)
(See previous post for making the envelope.)
Labels:
Mothers Class,
Postage Friendly,
Stampin' Up,
Three of a Kind
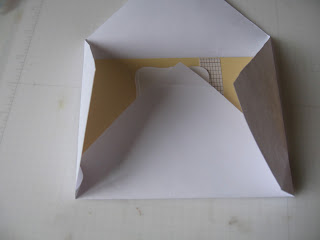
MAKING AN ENVELOPE "FREE HAND"
2. Open the sides and fold the bottom flap up so that the point lines up visually with the point of the flap above. It should come almost to the edge of an A2 card, as shown.
3. Refold the bottom and sides so that the side flaps are under the bottom flap. Fold over the point so make it neater. (The ruler is just there to hold it closed for the photo.)
4. Fold the top flap down. Then open all the flaps and remove the card.
5. Cut out all 4 of the small triangles and refold, using glue stick or snail on the sides of the bottom flap. Now it is ready for mailing. Just add glue or snail to the sides of the top flap to seal. (Refer to previous photo.)
I hope this helps!
Monday, May 13, 2013
FROM THE SCRAP DRAWER
These flowers are from one of my favorite sets, "Flowers" from Inkadinkado. All I did was emboss them in white over sections of the dsp shown and cut them out. I also cut out two leaves from the green spots and attached them underneath. Finally, I punched the ferns out of a scrap piece of dark green cardstock.
The white panel, which looks like it matches the stamped flowers perfectly, is from some cardstock I embossed a few weeks ago at a friend's house. The card base itself is from a card I made but didn't really like; so I took it apart and reused it here.
After adding some pearls and gems, the card was done!
Sunday, May 12, 2013
FATHERS DAY CARD
Here's one of the cards we'll be doing in Mothers Class this week. I've included some sequins for a modern masculine touch!
Using the leftover squares from last week's window die, I glued diecut letters from the same cs used beneath the Very Vanilla layer. After taping down four strands of color-coordinated string, I attached the top layer with SU dimensionals. Then I used two more dimensionals for the square and stamped "awesome" above the strings.
At almost 95, my Dad really IS awesome. He still lives independently in his own apartment and drives his own car. We are truly blessed to still have him with us!
TIP: For tearing papers so that they are somewhat parallel, rip them together, one on top of the other. Then adjust the length by cutting the top layer across the top edge. Works every time!
Saturday, May 11, 2013
Thursday, May 9, 2013
Spring View from the Window
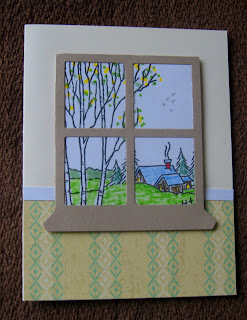
Here's one of the cards we did yesterday in Mothers Class. The window die is from Our Daily Bread Designs, but without the additional arch on top.
First we colored the pre-stamped scene with markers and attached it to the back of the window frame with TomBow Mono Glue. Next, we added the "wallpaper" to the bottom third of the card front and attached the "chair rail" above it. The window was then popped up with SU dimensionals.
There are some beautiful samples on the ODBD blog. This one was easy to do in class, and there's also some room for a greeting below the window. There's also room for a cat on the window sill!
Tuesday, May 7, 2013
I'VE BEEN PUBLISHED! (Again...)
I don't even remember sending this in, but I guess I did 'cause here it is in this summer's issue of "Just Cards!/Christmas!" page 112.
My free issue came in the mail yesterday, and what a surprise! Sometimes not having a memory can really be fun ;)
Labels:
Christmas Cards,
Just Published,
Postage Friendly,
Stampin' Up
Subscribe to:
Comments (Atom)


