Saturday, November 15, 2014

TWO OUT OF THREE

NOTE:  Although it doesn't look it here, both these cards were done with the same colored pencils and match their red backgrounds perfectly.

I originally started out to make three cards with this new image from the Greenhouse Society (Technique Tuesday.)  However, one of the images came out blank in the middle and would have been unusable had I not layered it with the other.

The red petals were done with three shades of red.  The leaves were done with three shades of green and a brownish red.  Several months ago, I  took a class on colored pencils during which I learned to add the red (or maroon) to leaves and stems for shading.  I never would have thought that would work, but I really like how it makes the leaves more realistic.

The second card is the layered one, popped up with dimensionals.  The gold twine was wrapped around the panel three times and taped down on the back.  The bow was added with a glue dot on the front, a "sneaky" way to make it much easier.

Using colored pencils is a relaxing form of coloring images.  It's also very transportable, either when going on vacation or just out to the deck on warm, sunny days.  I love to stamp images on white cs and take them with my colored pencil tin to a quiet spot!

Monday, November 10, 2014

CHRISTMAS STAMP-A-STACK


This is the card I designed for our last Mothers Class the first week in December.  It's easy to assemble and should make a nice finale for our Fall sessions.

The top-fold card base is Always Artichoke, the die cut window is white cs, and the tree is stamped on light green cs and punched out.  The bottom corners are rounded.


To make the tree sparkle, I brushed it with a light coating of TomBow mono glue and sprinkled it with Sugar Coating glitter.  You can see how much it glistens in the sunlight in the photo below.  The star is punched from silver glitter paper and attached with a glue dot.  The tree is mounted with SU dimensionals, and three rhinestones were added for balance. 

 The inside greeting will be stamped on printer paper with Versafine Olympia Green ink.  After rounding the bottom corners, it will be attached with snail.

This year's class has been a lot of fun, and I look forward to reconvening in February.  Hopefully, the worst of winter will be drawing to a close by then!

Thursday, November 6, 2014

TISSUE BOX CHRISTMAS TREE


(See previous post first.)


One last scrap becomes a tree!  This one was decorated with red gems and a glittering gold star.  A little gold twine and some shiny sequins give this card a bright finish.

What will the next tissue box bring???


TISSUE BOX CHRISTMAS CARD


If you shop at Weis Markets, you might recognize the floral design from their tissue boxes.  After pulling up the last tissue in the box, I thought it would be a waste to throw it away (the box, that is!); so I used the side panel for the die cut on this card.

After stamping the poinsettia twice and cutting down one of them to pop up on the top, I painted the flower with Twinkling H2O's.  Then I layered the red one over the green with SU dimensionals, added yellow Stickles in the center and attached it to the card with dimennsionals.

Recycling at its best!

Wednesday, November 5, 2014

ORNAMENTAL PINE BACKGROUND

I've made a lot of cards featuring the Ornamental Pine set, but this time I wanted to try using it for a background.  The chickadee from Our Daily Bread Designs came with a coordinating die, which makes it easy use in a variety of ways.

First I stamped the pine bough a few times along the side of the panel, then ran it through my Cuttlebug with the stitched rectangle die.  After stamping the bird and coloring it with colored pencils, I used the matching die.  I cut away some unwanted branches before mounting it to the panel with dimensionals.  I added the greeting and used TomBow glue to attach both panels to the gray card.

Very easy to do!

Tuesday, November 4, 2014

PINECONE WREATH

When I saw this design (in more than one place) I knew I had to give it a try!

Using Colorbox Chestnut Roan ink, I stamped the pine cone at 12, 3, 6 and 9 o'clock.  Then I went around again in between the first four after stamping off on a piece of scrap paper.  For more of a color variation, I switched inks to an Adirondack Rainbow pad, Woodlands.  Keeping to the left side of the pad (the browns) I continued around the wreath, stamping twice without re-inking each time.

I'm amazed at how easy this was the first time around!  I finished by adding the jute bow and greeting.  Finally, I used Diamond Stickles on the pine cones to give it some sparkle.

For the Klass-y wreath which inspired me most, click HERE.
Thanks, Bonnie!

Monday, November 3, 2014

JUST A REMINDER!

DON'T FORGET TO VOTE!

Sunday, November 2, 2014

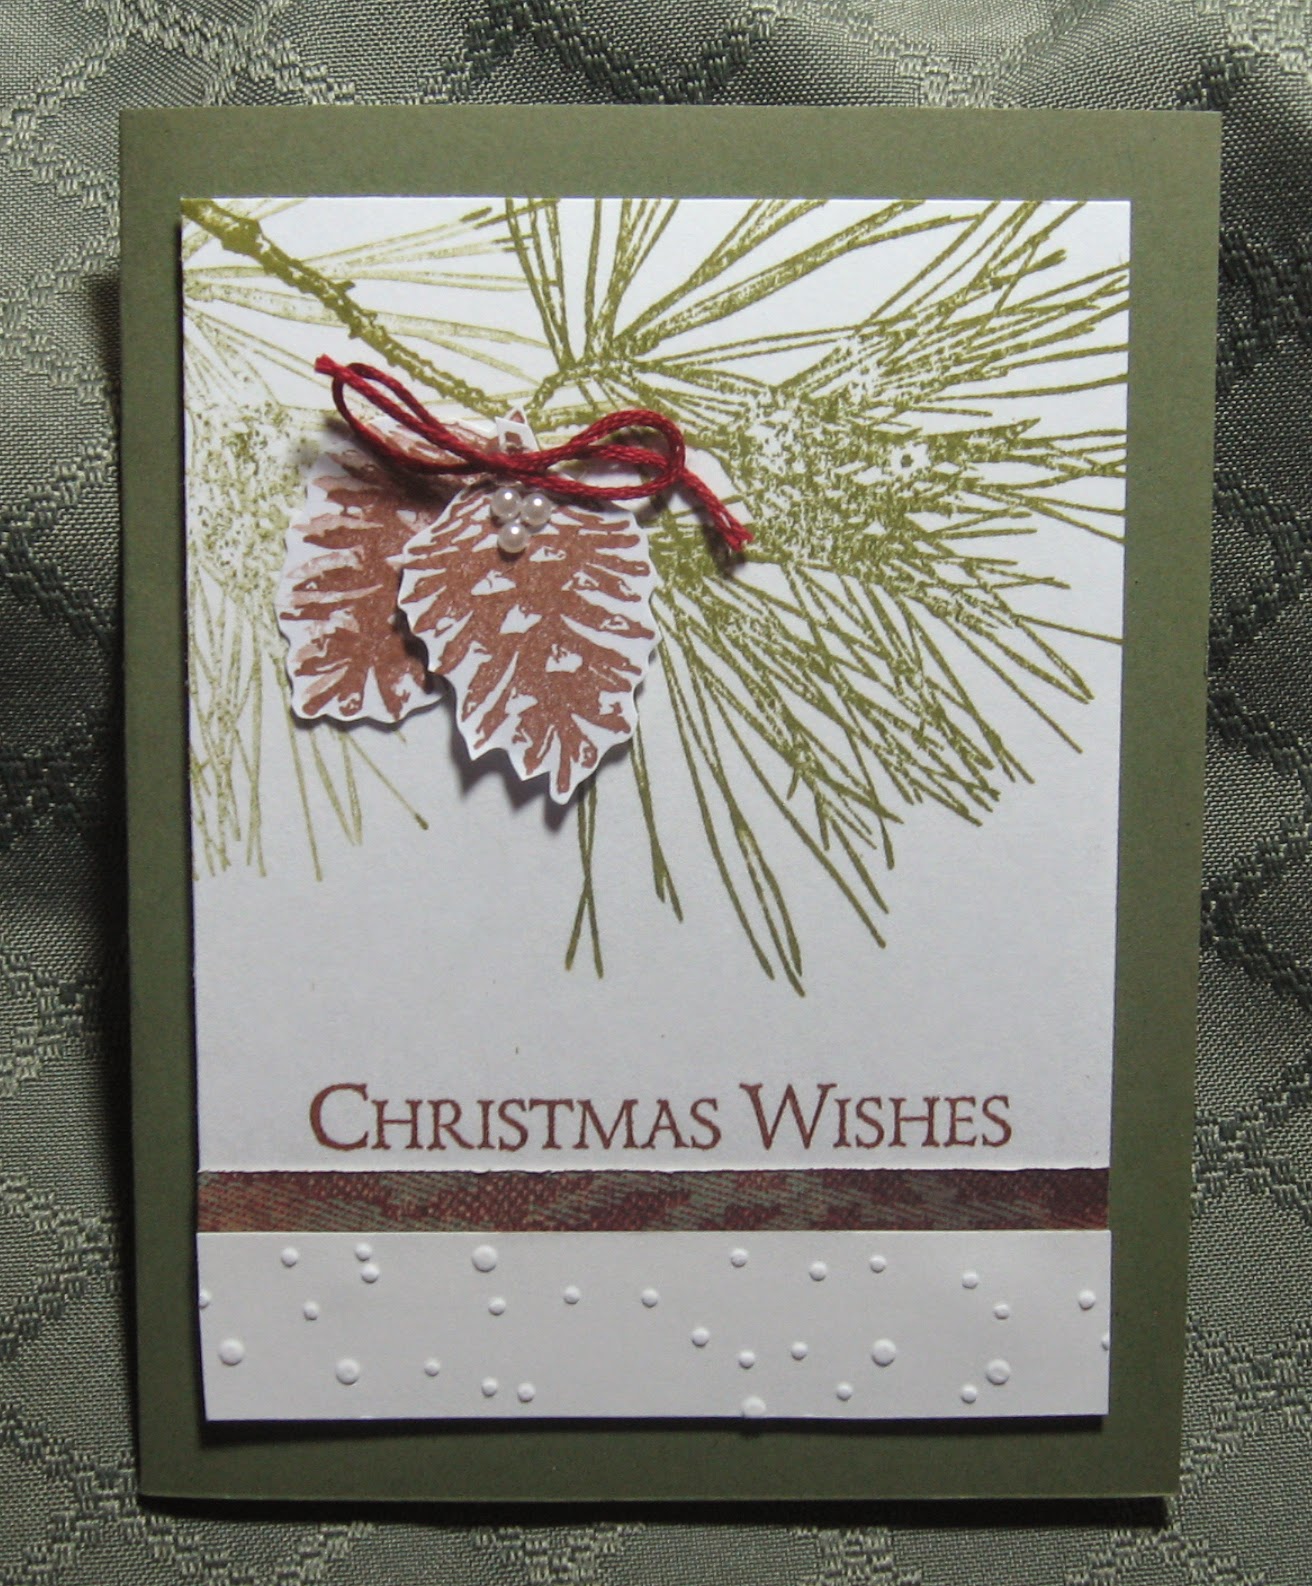
TEXTURED WISHES

Ever finish a card and feel like it needs "something" for a final touch?  That's what happened here.

After stamping the pine branches and fussy cutting the two pinecones, I added the bow and greeting; but there was too much dead space at the bottom.  At first, I added the thin strip of dsp which had the same color red as the bow.  It still needed "something" however, but what???

Then I spied a piece of embossed cs that someone sent me ages ago (Bonnie, I think) and added it to the bottom.  As Frenchie would say (on YouTube) "voila!"  It was done!

TIP:  Sometimes, all a card needs is a little texture to give it interest without distracting from the simplicity of the card.

Friday, October 31, 2014

ONE OF A KIND


This card was a lot of work, but worth the effort.  I started with the background trees dsp which covers the entire card front.  Next, I stamped the pine branches from SU Ornamental Pine on a piece of vellum and set it aside to dry.

The greeting was done using a vertical stamp with an ornament at the bottom which I cut off.  (Sorry, I don't remember the company.)  I cut it down to a banner and used it horizontally.  After stamping two pine cones and fussy cutting them, I assembled the card.

First, I glued the vellum panel down and added a strip of dsp across the top of it.  Then I added the pine cones, jute and greeting as shown.  Finally, I added the SU brad on the bottom corner.

This card took about an hour from start to finish, hence the "one of a kind" label.  The time spent includes the design idea and all the changes I made along the way.  A second one would probably take about 15 minutes, but I'm not up for that with all the cards I still need to make.  So far, I have 75 out of 100 done!

Thursday, October 30, 2014

CHRISTMAS GREENS

Funny, but I almost scrapped this one.  When I started, the white panel was larger--too large for the effect I was going for.  When I cut it down, there was too much white space even after I mounted it on the dark green cs.

To fix it, I sponged heavily along the card edges and lightly on the panel edges.  Surprisingly, it worked!

Before attaching the panel to the card, I added the gold twine and gold-embossed pine cone.  Then I used SU dimensionals to add it to the card front and another dimensional behind the pine cone.

Whew!

Tuesday, October 28, 2014

ANOTHER FESTIVAL OF TREES CARD

First I stamped the trees with Versafine Smokey Gray, three times without re-inking.  Next I stamped the greeting in Memento Paris Dusk and added the various sizes of snowflakes with the same blue ink.  Once the stamping was done, I tore a narrow strip of white cs and added it to the bottom of the white panel and sponged the edges on the top and two sides.  Then I glued it to the dark blue panel and mounted it on the gray card front.

The Mothers Class will be making this one on Wed.

Monday, October 27, 2014

THREE OF A KIND--Holiday Knit

Another 3-of-a-kind card within the week!  This one was inspired by a Tim Holtz stencil.

The stencil reminds me of a Scandinavian sweater, which gives the cards a warm, cozy feel.  The easiest to work with was the round one done with Versamark and white embossing powder.  The top right was done with white pigment ink and clear embossed to keep it from smearing.  The bottom right was done with Versamark and clear embossing powder.

I think the first one is my favorite!


Thursday, October 23, 2014

THREE OF A KIND--Festival of Trees

The SU Festival of Trees set is so versatile with many possibilities!

This first one features stars at the bottom of the tree--imagine that!  (Just my warped sense of humor at play here.)  After punching out the tree and running it through the Cuttlebug for the stitched rectangle, we mounted the panel with dimensionals over the dsp so that it showed through and also formed a border.


The second card is a shaker design I came up with for my own
Christmas card stash.  The tag is sandwiched with thin strips  of
foam tape to form the shaker and mounted over the large dots dsp.


Finally, the three trees were stamped on green cardstock and punched out over the snowy background along a piece of torn white cs.  Glitter was added for the snow.

These were all fun --and simple-- to make!


Do you know the story of  The Three Trees?  To make it short, one tree wanted to grow up and be a treasure chest.  Another wanted to be a big ship, and the last wanted to grow tall and point to the sky.  When it was time for them to be harvested, the first one became the manger for the baby Jesus.  The second one was a fishing boat that held the fishermen and their Master who calmed the sea.  Finally, the last was formed into a cross upon which the Final Sacrifice was made to take away our sins.  What a beautiful Christmas story!


Tuesday, October 21, 2014

CHRISTMAS BLESSINGS


This is one of those cards that looks better in real life!
However, I do like how it came out.  The twine bow is on the stem of a popped up pine cone from the Ornamental Pine set.  The greeting is from a Simon Says Stamp die cut set of "Christmas Blessings."
The plaid dsp is a deeper red than it appears here, giving it a richer look.

Monday, October 13, 2014

FESTIVAL OF TREES

This was an easy card for Mothers Class featuring another way to use this SU set and matching punch!

After stamping the tree, punching it out and adding rhinestones, we mounted it with dimensionals over a narrow strip of red foil paper.  Then we attached the first half of the greeting on the front, and the second half inside with a gold star holding it down.

Simple but elegant...

Sunday, October 12, 2014

Z-FOLD HALLOWEEN CARD

The second card we made last week was this one for Halloween.  It couldn't have been easier!

First we folded back the front to form the Z.  Next, we used the Candy Corn die cut from Simon Says Stamp by attaching it to a white panel with rounded corners, coloring in the candy corn with markers and adding tiny black gems in the spaces.  After attaching the Halloween dsp to the front and inside panels, being careful to put adhesive on the left side only, we stamped the greeting on the inside over stars stamped in lilac.  For the final touch, we added the black twine bow.  It was a fun class!

Saturday, October 11, 2014

MY COMPUTER IS BACK!

...AND SO AM I!


Even though I haven't been able to post photos, I have been busy stamping.  I now have 40 Christmas cards done (60 more to go..)  YAY!

This Z-fold card was for Mothers Class last week.  Although easy enough to do, it was time consuming because of all the steps and fussy cutting of the packages.  The dsp is from a 12 x 12 pad from Hobby Lobby that I had left over from last year.  The same Festival of Trees stamp set and punch has been (and will continue to be) used.  They had fun sanding the Swiss Dots embossing.  We added Stickles on all the red ornaments for extra shine.

It's been fun coming up with so many different ideas from the same stamp set.  Stay tuned for more...

Sunday, October 5, 2014

STILL NO COMPUTER

Hope you all had a fun World Cardmaking Day! I made some neat cards and had a relaxing rainy day in the Tower. Since my computer is ten years old, I may have to get a new one...we'll see... Waiting for the repairman to get back to us, probably tomorrow.

Thursday, October 2, 2014

GREETINGS FROM MY IPAD

My computer has died after having frozen up for weeks.  I hope to get blogging again soon!