Thursday, February 7, 2019

SOMETHING OLD, SOMETHING NEW #2


This second card uses another page from the same dsp
pad as the last one posted.  The flower is another block
from the same Sweet and Sassy set,
colored differently.
Instead of using sequins for embellishments, I chose to
use my butterfly punch and a scrap of marbled dsp.  The
antennae are shaped brown wires from an "ancient" set
in my stash.
 

Wednesday, February 6, 2019

PAPER PLAYERS--Love Is In the Air


For this card, I used the Concord and Ninth Turnabout stamp set.  I'm still not used to how it works, but at least this one turned out ok.

For more cards with this love theme, go to thepaperplayers.blogspot.com.

Happy stamping!


SOMETHING OLD, SOMETHING NEW


The dsp used here is from my stash, from years back.  The flower is from a new Sweet and Sassy set, "Flower Blocks 3."

The block was stamped in black and colored in with pencils.  When I went to cut it, though, I clipped the right side a little too close.  Rather than scrap it, I purposely butted it to the edge of the cardfront.  I used a narrow piece of the reverse side of the dsp as a contrasting strip and tied some matching embroidery floss around it.

Since the flower seed is yellow, I used the same color scrap for the greeting.  For embellishment, I added 3 yellow sequins.

Enjoy!

Sunday, February 3, 2019

ONE LAST VALENTINE


This card was done with the turnabout wreath stamp set  from Concord & Ninth.  After stamping the wreath in my MISTI according to the directions, I die cut it and mounted it on a green card base.  I finished it off with some leftover embellishments on my table.


Wednesday, January 30, 2019

JUST A NOTE MUSICAL CARD


After making the envelope and running a black marker along the flap edge, I started on the card.

I then cut a piece of dsp and glued it to the front.  Next I cut away about a half inch off the right, adding a 1" striped piece to the inside of the card, giving it a piano-ish look.

Next, I die cut a black oval and punched the black cat from a leftover section of SU Halloween dsp.  I gave it some white whiskers and paws, colored the eyes gold and mounted it on the oval.  I slipped a piece of white cs underneath to ground it and finished up with a greeting banner.  It's now ready for writing and mailing!


Tuesday, January 29, 2019

MID WINTER NOTE


This was a fun card to make and will be going out to a friend on Monday.

I just love this sentiment.

Monday, January 28, 2019

BLACK, WHITE AND RED


Another easy card to make!  Starting with a scalloped panel of dsp, I then added a --you guessed it--Watermelon Wonder heart-embossed panel which I wrapped with silver twine before attaching with dimensionals.  The silver flower (looks black here) was layered with a smaller white blossom and a red sequin with some white sprigs behind it.

Once everything was mounted, it came to life!


Sunday, January 27, 2019

PAPER PLAYERS--Sketch


The sketch for this week was pretty straight forward.  The circle and sprigs were done using scraps of copper cardstock.  The rest was done with SU dsp, scraps of course!

For other Paper Player submissions, click HERE.

Thursday, January 24, 2019

NON-TRADITIONAL COLORS


It's been fun making Valentines with all kinds of scraps in my "tower!"

Wednesday, January 23, 2019

BLACK AND WHITE VALENTINE


Here's a super simple card to make:

First, I attached a floral panel to the card front.  Then I ran the heart swoosh through the die cut machine, glued it to the card front and popped up the heart with a dimensional.  The greeting is stamped on a scrap of white and red-dotted dsp.

Done!

Monday, January 21, 2019

TOWER DE-CLUTTERED (AGAIN!)

 The view from my door. When a guest stamper comes, I just pull the table out
 at an angle and provide the desk chair.


 This is the "view" from my chair. On the left side of the blotter is a
recipe box with index cards for each of the Silver Stampers I send cards to.
I jot down what I send so I don't send duplicates.
Next is a container of precut cardstock.  The LED lamp is a huge
improvement over the last lamp I had.  The cup holds pens and 
pencils, bone folder, brushes, etc.  Next is a box of tissues and a
wood crate for items of display.  On the wall is a narrow shelf
holding photos and a clock.


To the right of my chair is a small cart.  I use the top drawer
for all kinds of adhesives, keeping it open while I'm stamping.  This
prevents me from having to search constantly for an item.  The glue dots
are in a small red box easily seen when I need it.

 Behind me is another whole wall of supplies.  I store all my dies
in a plastic basket, easily reachable from my chair.


 This is my cutting station.  I keep most-used cardstock in the letter sorter.
The yellow slinky, which my DH made for me, holds outgoing mail 
and an envelope of seasonal "forever" postage stamps.  The lamp above
the radio goes on with a switch by the door.


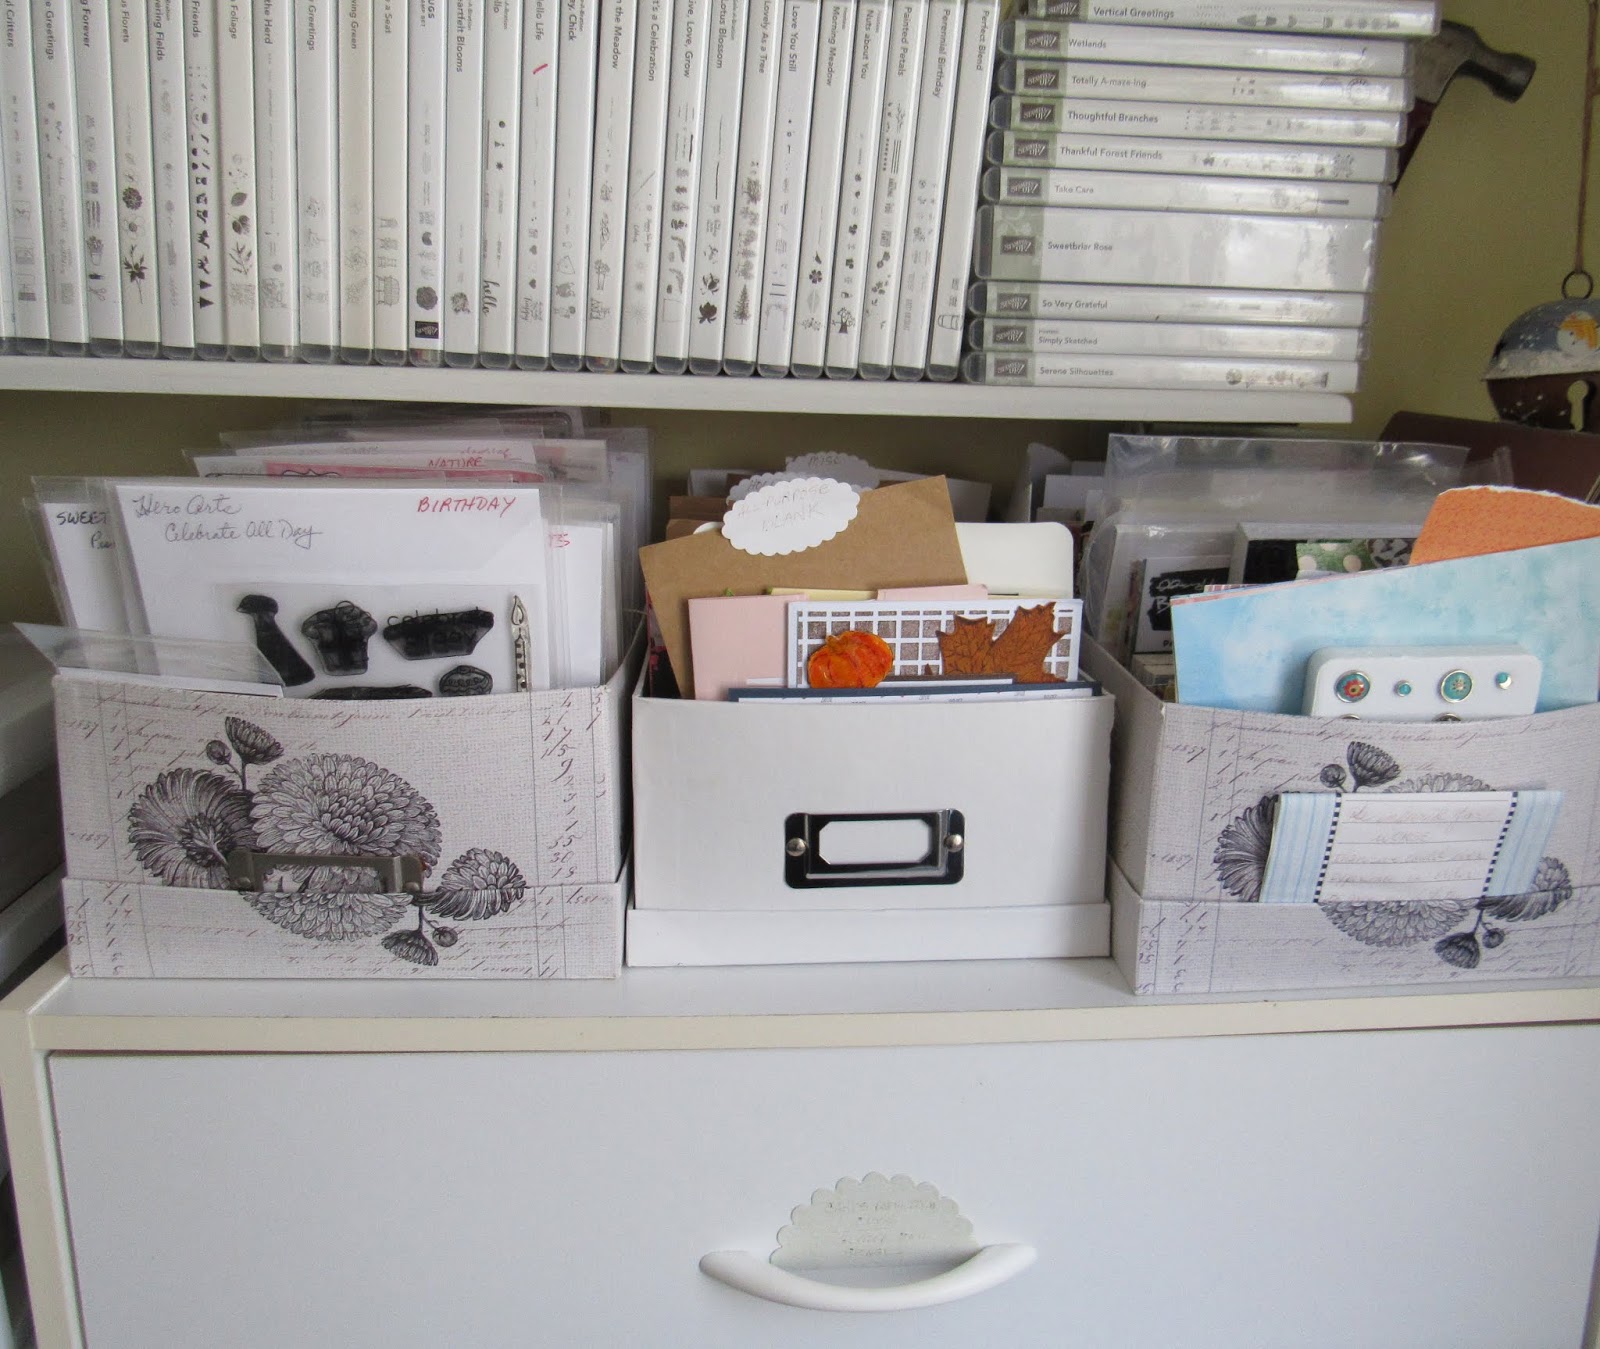
 These three boxes hold polymer stamps, finished cards for mailing, 
and a collection of small dsp pads.


Above the previous 3 boxes are all my SU stamp sets arranged in
alphabetical order.  The top stack holds just word sets, and the stack on the right
holds sets that coordinate with punches or dies.  To the right of the sets are my
punches, housed in the slots on the bottom two tiers.  The rest of the
spaces hold ink pads I've had for almost 20 years and still work!

January is a good de-cluttering month!

Sunday, January 20, 2019

WATERMELON WONDER VALENTINE


As you know, I'm not fond of pink; so these two feature Watermelon Wonder cardstock.  It's actually more reddish than the hot pink look in the photo.

The heart swoosh is from Poppy, and it cuts out the heart and swoosh in one cut.  I chose to make one card vertical and the other horizontal, and used some floral dsp from a 6x6 pad I purchased at Hobby Lobby.


Saturday, January 19, 2019

Friday, January 18, 2019

SECURED BUTTERFLIES


I recently received a card with the main image loose in the envelope.  The sender had glued it over the white glitter paper, and it fell off the card along the way.  Here are two ways to secure something on a rough surface (like glitter):

TIP:  This card shows two butterflies attached with glue dots that were placed on the green cardstock, thereby avoiding the glitter paper.  The top one has glue dots on each upper wing, and the bottom one has glue dots on the lower section of the wings.

Another way to secure an image over a rough surface is to cut an opening out of the middle before attaching to the card front. Then add your image with glue dots or dimensionals to the exposed cardstock underneath.

Either way, no more loose pieces! 


Thursday, January 17, 2019

FIRST TURNABOUT CARD

The Concord & 9th turnabout stamp set that I ordered way back in November arrived yesterday afternoon.  (No idea why it took so long!)

First, I chose the card base and the dsp.  Then I took out 5 coordinating inks:  light green, dark green, pistachio, brown and red.  After stamping the leaves with the first four inks, I cut the panel down and edged it with a dark green marker. 

For the final touch, I added a red button and jute bow to the center.

Not an easy stamp set to use, but worth the effort.


Wednesday, January 16, 2019

VELLUM VALENTINE


This is just a clean and simple Valentine with a wooden heart and red button from my stash.  I don't have a set of heart dies, but my bestest friend, Evelyn, does; so we made a few at her house.

The scrap of dsp, more visible than in this photo, was attached to the card front with Fast Fuse.  The die cut heart panel was added on top with more Fast Fuse, ready for mailing.