Sunday, February 28, 2016

PAPER PLAYERS #284

Paper Players this week is a sketch, and I also plan to give this card  to our pastor for his use..

I got the color scheme from a SU! pad of dsp I bought at a garage sale last summer.  I like the brightness of the colors, tempered with the gray.

As you can see, I'm still thrilled to use the Botanical Blooms dies.  The flower sequins have been in my stash for ages, and there were some purple ones that matched--amazing!

Check out the other entries HERE.

Thursday, February 25, 2016

HELLO, FRIEND


I thought it best to show the inside as well as the outside for this card.  To start, I covered the front with a piece of dsp.  Next, I added a strip of the coordinating dsp from the Boho collection.  Then I punched out the middle square and three dsp squares with the 1 1/4" punch.  Two dsp squares were glued to the purple strip, and the third was mounted on the inside of the card so that it shows through the punched square.


After adding the embellishments and the white embroidery floss  on the front, I stamped the inside and added some sequins. 


Wednesday, February 24, 2016

SCHOOL COLORS

Our granddaughter, a Freshman at the same school as her brother, also made High Honors this year.  Her card is done in school colors using some SU! dsp for the gold and cardstock for the blue.

The pattern is taken from the same book used in yesterday's post.  In addition to the die cut Botanical Blooms, I added some gems and gold thread for embellishment.  Flower petals were also enhanced with some clear Wink of Stella.

We are so proud of all four of our grandchildren--can you tell?.  They are all  doing well academically and in their sports and/or music interests.  Must be genetic! *wink*

Tuesday, February 23, 2016

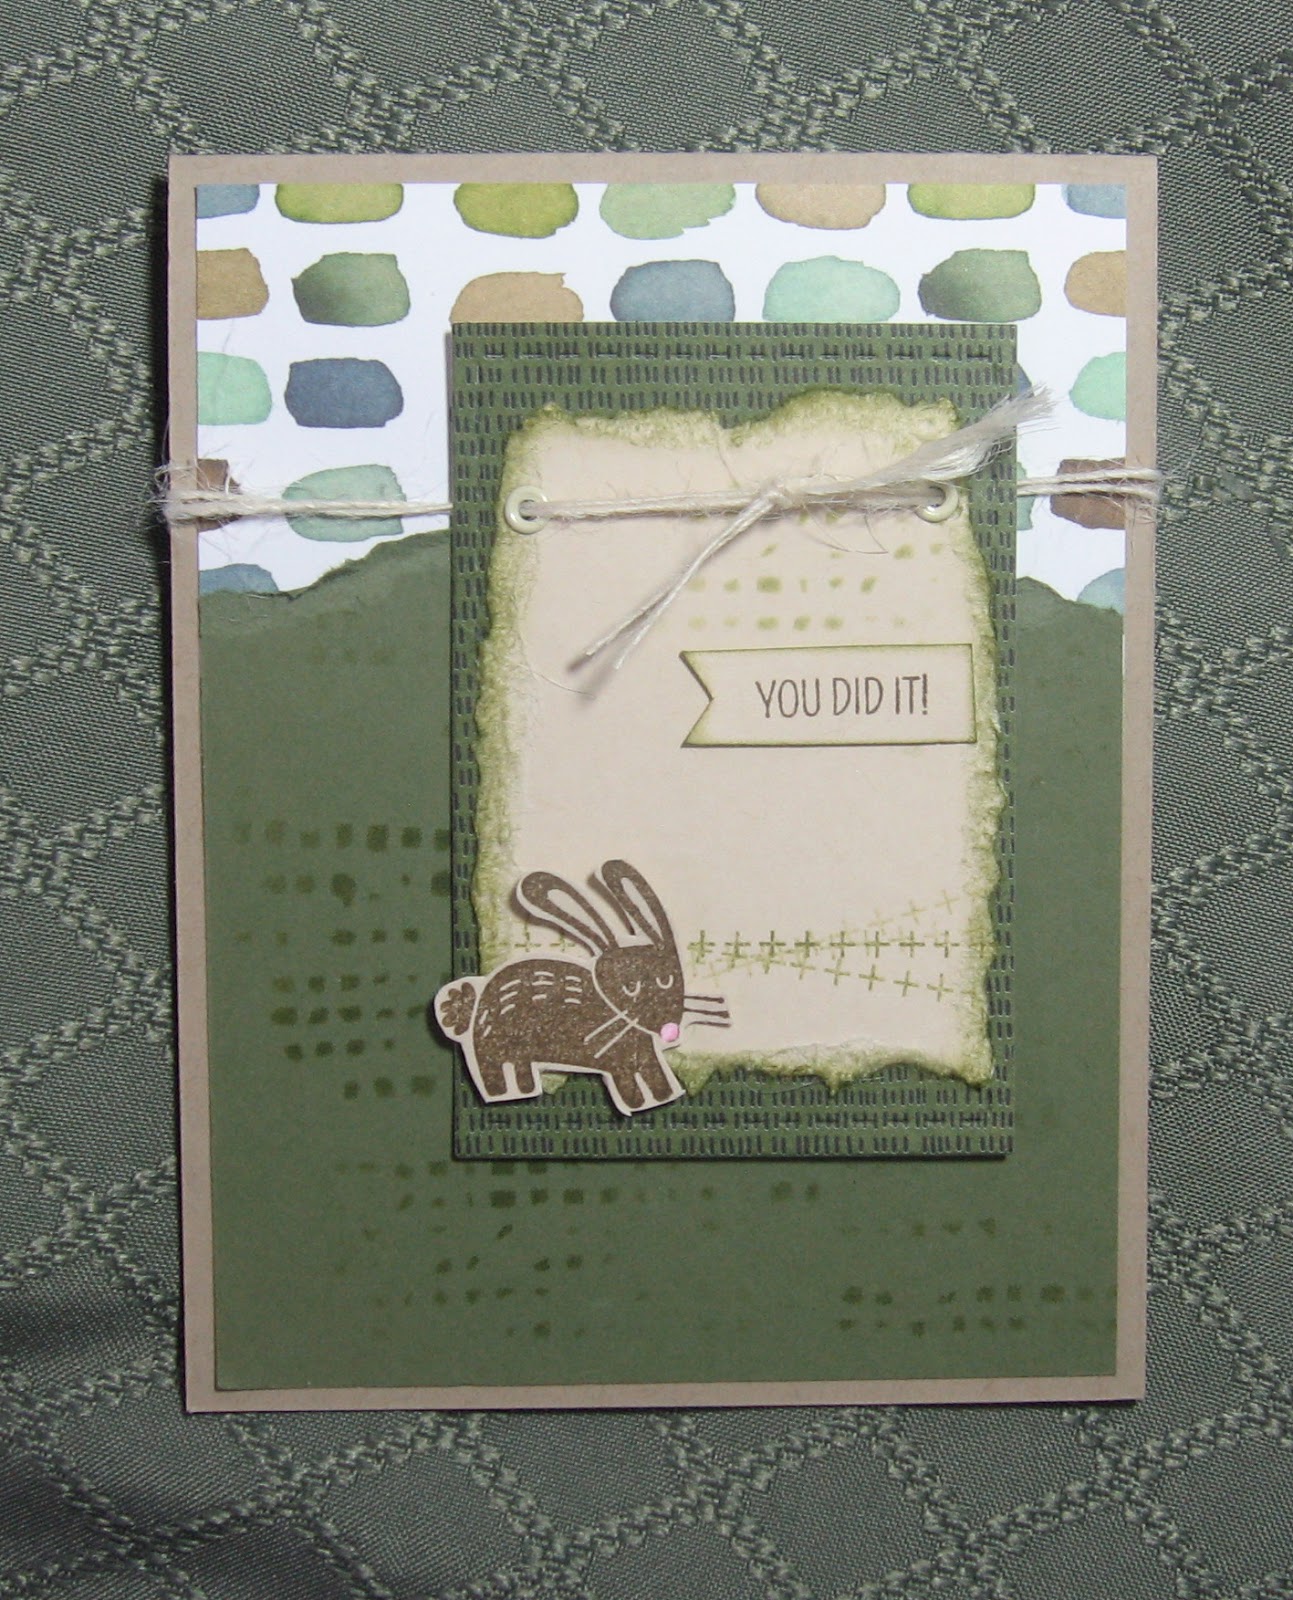
MASCULINE CONGRATS CARD

This is the card I made for my grandson who made high honors and will be going to the awards banquet next month.

The rabbit is the basis of some private jokes between him and my husband, so I included it here.  I'm sure he'll get a chuckle out of it!

The card pattern is from a book called "Originals" by Jeanette R. Lynton.  I bought it several years ago, and it's been sitting on the shelf in the Tower ever since. It has lots of ideas and layouts which I plan to try in the weeks ahead.  Then I plan to send it to one of my followers, so stay tuned!

Thursday, February 18, 2016

PAPER PUMPKIN FEBRUARY 2016--Alternate Idea

After cutting down one of the card fronts, I mounted it on a piece of light blue cardstock.  I stamped Hello and "birthday girl" and added some of the flowers from the stamp set included in the paper pumpkin.

Using a white card base, I glued the floral dsp from Botanical Blooms to it and mounted the stamped piece to the front of the card. Then I stamped the party hat on a scrap of white cs, fussy cut it and mounted it over the "o" with a dimensional..

Finally, I used some Wink of Stella on the party hat and added some of the sequins from the kit.to give it some shine.

Sunday, February 14, 2016

PAPER TREY INK CHALLENGE

This was a fun alphabet challenge where you used the letters in your name to make a new card.  Here's what my name required:
S for stitching
M for mixing of 2 stamp sets, one of which must be PTI
I for impression plate (Embossing folder)
T for twine
H for heat emboss

My card started out with a fern from the PTI Meadow Greens stamp and die set where I turned a fern into a fir tree!  How?  By using the negative space created by the fern die and then using the space as a stencil.  I sponged the "tree" with dark green ink, then clear embossed it.  The background was sponged with two shades of green ink and some blue for the sky.    After adding "snow" on the branches with a white gel pen, I used a stitched rectangle die.  Then I enhanced the stitched border with a black ink pen.

Next, I chose a pale green cardstock for the base and a dark green cs for the dry embossed border, even though the border shows only a tiny bit.  I wrapped some twine across the bottom of the rectangle and mounted it in the center of the frame with foam mounting tape.  Finally, I added the greeting from a SU! set.

Click HERE for the other entries.


Saturday, February 13, 2016

VALENTINE FOR SOMEONE SPECIAL

...EXTRA SPECIAL, THAT IS!

This one is going to my husband.  Since the name of our property is "Fox Mountain" this image is very appropriate.

When my then boyfriend came to take me out on our first date, my dad told me "Don't let this one get away."  Egads! That was a half century ago!

My dad gave me good advice.

Monday, February 8, 2016

TROPICAL BLOOMS IN MID-WINTER!

I just spent a pleasant afternoon in the Tower where I decided to combine two sets which really go together nicely:  the bird from "A Happy Thing" and the new Botanical Blooms bundle.

The birds were stamped with Distress Pumice Stone and colored with markers.  The bottom left was fussy cut and placed on a more subdued pattern.  For the others were, I die cut them with an oval die so they'd show up more on the dsp.  After choosing cardstock that fit the colors used, I had fun embellishing with flowers, gems and sequins.

Can you tell that I enjoy this Botanical set?

Saturday, February 6, 2016

NOT SO SIMPLE SATURDAY #42

 ...but not difficult--just time consuming.  Here is a tip for using numerous dies:

TIP Before starting to put together on the cards. first run multiple dies through the Big Shot at once to save time.  Just lay the small pieces of cardstock with the dies on top of the cutting plate and run all of them through at once.  Do it again with other colors as desired.  Be sure to put all the pieces in a small container so they don't get lost in the shuffle.


I had a pleasant day here in the tower with the sun streaming through the windows and all these beautiful Botanical Blooms to play with!


BTW, these two cards were made to fit #6 3/4 envelopes, which are cheaper than the usual invitation size.  The dimensions are 5 1/2 x 7", folded in half to form a card front that is 5 1/2 x 3 3/4.  You still get 2 cards per sheet of cardstock.  Since I send out 500 or so cards a year, the savings are quite a bit for me.

Friday, February 5, 2016

ANOTHER GOLD SOIREE VALENTINE


The metallic gold-lined dsp made the perfect backdrop for the two banners, two medium sized hearts, three smaller hearts and the sequins.  There are three more hearts inside with "Celebrate"  from the SU set, "Send a Celebration."  How appropriate!


Monday, February 1, 2016

HAPPY GROUND HOG DAY!

Let's hope Phil won't be bearing the bad news of.six more weeks of winter.  So far, we've had it easy here in NW New Jersey.  I, for one, would like to keep it that way!

PAPER PLAYERS TIC-TAC-TOE #PP280

As soon as I saw Flowers, Die Cuts and Yellow in the same row, I knew just what I wanted to do, thanks to the Botanical Blooms set!

TIP:  To keep the inner parts of the petals from flattening in the mail, I prop them up with tiny pieces of clear foam tape.


HERE is the link to the Paper Players web site.

Sunday, January 31, 2016

PAPER PUMPKIN ALTERNATES

These are two of the alternate Valentines that our demonstrator, Cyndy, had for us to make on Thursday.  She found these, and a few others, online somewhere; and they were very easy to make.  I came home inspired to come up with more on my own, so check back later in the week!

Saturday, January 30, 2016

TIC-TAC-TOE CHALLENGE

For Stamp Ink Paper's challenge #32 I chose a diagonal row on the Tic-Tac-Toe board.  The card needs to have a heart, "Love" and Patterned Paper.

This was easy to put together.  For a look at the other submissions -- great way to gather new card ideas-- click HERE.

SIMPLE SATURDAY #41


Thursday, January 28, 2016

BOTANICAL HELLOS


I'm really enjoying these Botanical stamps and papers, especially in the middle of winter.  This first one looks bright and cheery, and I may just use it as an unconventional Valentine card...or maybe an encouragement card.  The raised petals are held up with clear foam tape.


This second card is on a Cajun Craze background which, unfortunately,  looks brighter here.  I stamped the veins and centers on the dsp and added some sequins for embellishment.  The "hello" is a die cut of black cardstock.


I hope the recipients of these cards find them as cheerful as I have while making them!

Wednesday, January 27, 2016

BOTANICAL BLOSSOMS

Well, all I can say is that it sure pays to host a Stampin'Up party!  I put together a catalog order with my friends to take advantage of the Sale-a-bration event (ongoing to March 31st) and used my Hostess credits and free stamp set rewards for the Botanical Blooms Bundle and matching cardstock, dsp and embellishments.  This is the first card I've made since UPS delivered everything yesterday afternoon.

I saw this card on a Frenchie Stamps video and couldn't wait to try it, so I asked my demonstrator, Cyndy, it she would teach us how at our next Technique class.  That was last week, so as soon as I got out my new supplies, I came up with this one.  I can't wait to make some more.

The "My friend" stamp is from the Sale-a-bration stamp set "Hello" (free with a $50 order).  I just love the tropical leaves and flowers, and it will go with a stamp I have that says, "Always maintain a kind of summer, even in the middle of winter."  Good advice, and this stamp set will help me do that!

Saturday, January 23, 2016

STILL SNOWING AND BLOWING...

...and I'm STILL STAMPING!

First I made two Valentine goodie bags for my two youngest grandsons, using the January Paper Pumpkin kit.  Then I tried piecing this quilt pattern with another of the new dies.

Gluing the tiny pieces of this design was tedious and took forever, although I do like the look now that it's done.  I used the same paper for the "hello" below so that it would match.

All the cards I made today will serve as Valentines, along with several other more traditional designs.  It has been a great day to stamp, and (so far) we still have power!


(Be sure to scroll down for the other 2 posts for today.)

THE WEATHER OUTSIDE IS FRIGHTFUL,

...BUT THE STAMPING IS DELIGHTFUL!


A package of three new quilt dies arrived yesterday, and I used one of them for these two cards.  I'm off now to try another one.


TIP:  When I die cut and glued the greeting on the front of each card, there were shiny spots from the glue around some of the letters.  So I dabbed the spots with my anti-static brush.  The powder stuck to the glue and eliminated the shine!

LET IT SNOW, LET IT SNOW, LET IT SNOW!

 Snow is blowing horizontally across the yard,
 outside the stamping tower window.


 The front porch through a snow-covered window.


...and a lonely little birdie trying to find
some bird seed.

No way to measure how much snow we got due to high winds and heavy drifting,
but it's a LOT!  There's more coming, too.  Thankfully, we still have power.

This is definitely GOOD STAMPING WEATHER!